Panhead for Sale: Buyer's Guide
Kevin Baas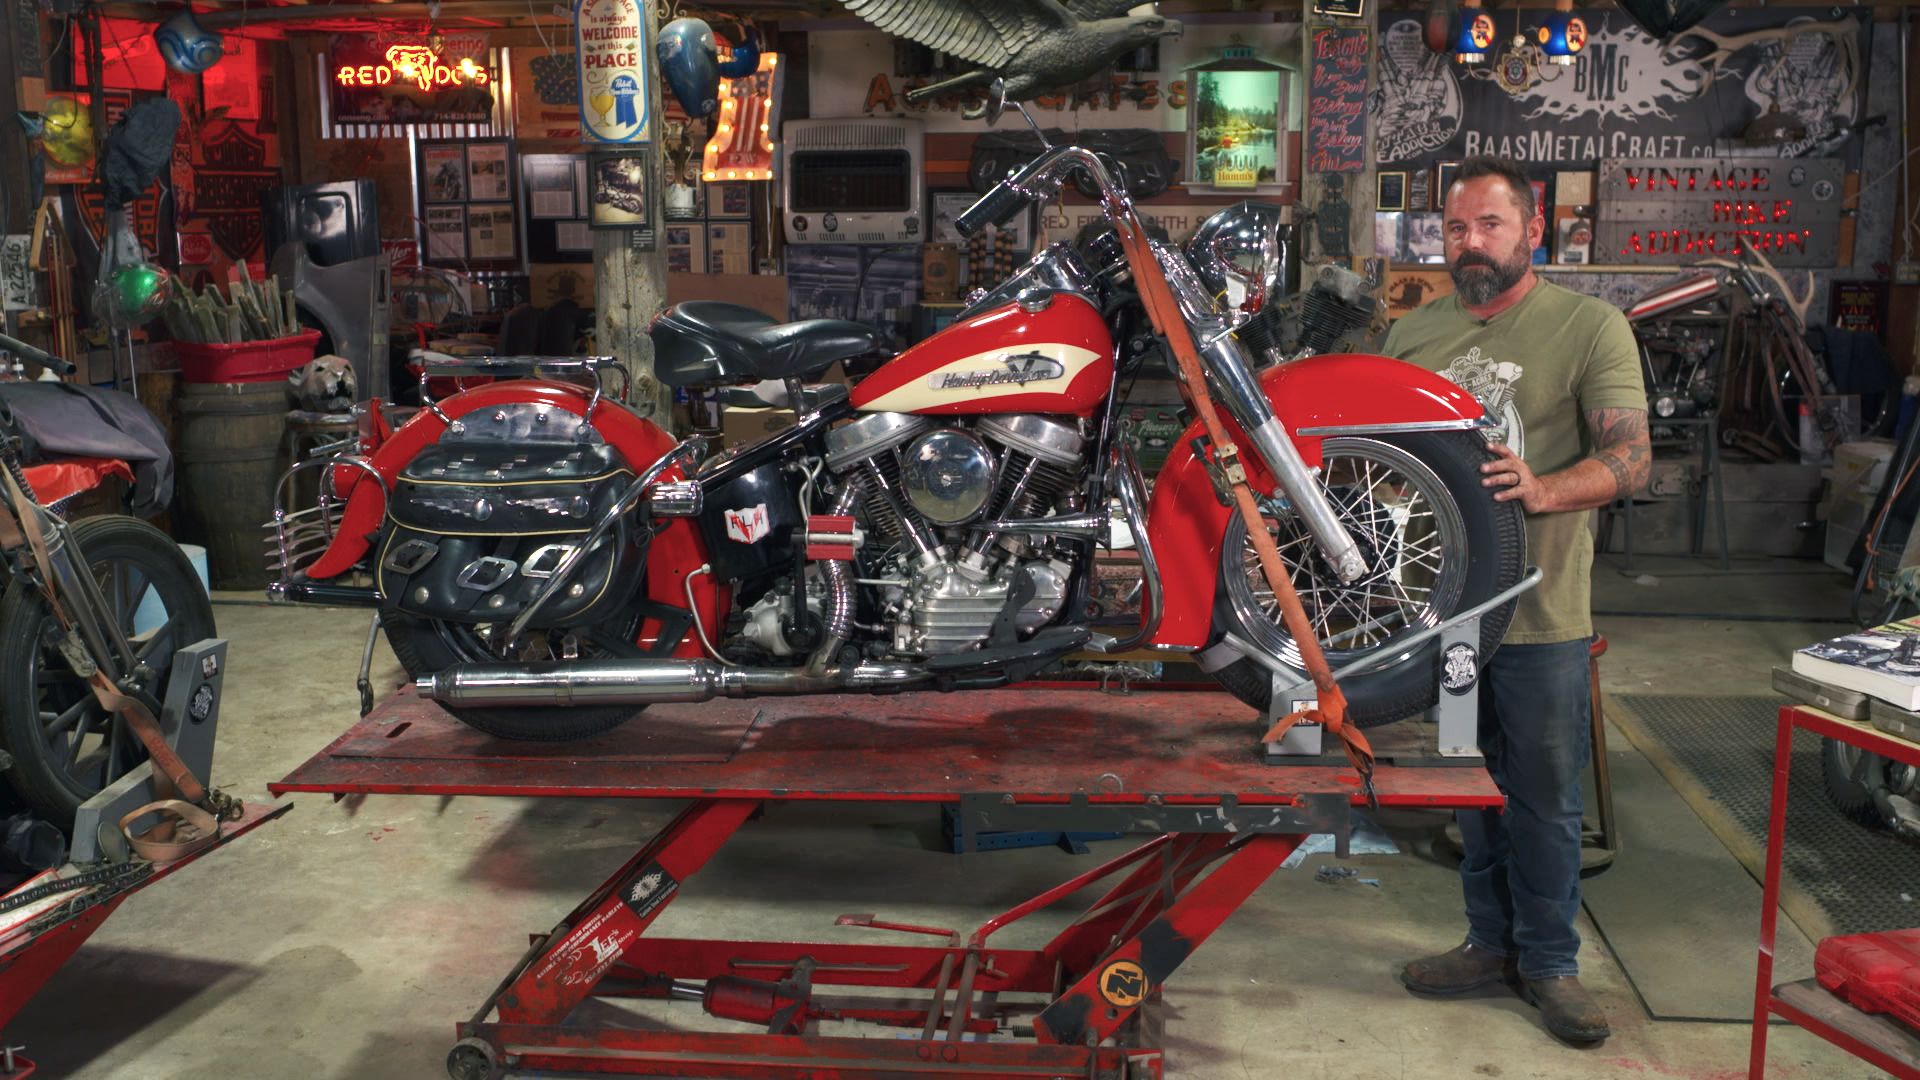
Video Player is loading.
Panhead for sale! Hold on—watch this video first. Kevin Baas gives us an overview of what to look for if you’re in the market for a Harley-Davidson Panhead motorcycle.
Here is Kevin’s checklist when you see that Panhead for sale:
– Tires: Front & rear tire condition. Look at thread depth. Check for cracking. Look for the manufacturer’s production date code.
– Wheels: look for possible bent rims. Check for loose or missing spokes. Check for correct wheel spacing and front axle.
– Front end: inspect mechanical front brake assembly. Look for possible loose or missing brake lugs on that Panhead for sale. Inspect lower sliders. Look for possible fork seal leaks. Inspect front fender and fender hardware.
– Lighting: inspect the headlight, passing lamps, and taillight assemblies. Inspect any visible wiring for condition and correct routing.
– Handlebars: inspect handlebars and handlebar risers. Verify everything is secure with no missing hardware.
– Neck area: Inspect the steering stem and dampner assembly. Check for proper function of the fork lock.
– Fuel tanks: Look at fuel tanks, tank mounting and condition of the fuel lines. Check for fuel leaks.
– Crash guard & floorboards: Inspect conditions and for correctly securing hardware.
– Motor: Check the motor VIN number. See if the motor is correct for the year and model. Check for possible broken cylinder fins and for leaks. If a motorcycle is running, make sure that it sounds healthy.
– Exhaust system: inspect condition of pipes and check all Exhaust mounting points.
– Rear brake system: inspect all moving points of this mechanical brake system. Inspect for proper lever actuation.
– Oil system: Inspect the oil tank, oil tank mounting points, inspect oil lines, and look for possible leaks.
– Transmission: Check the transmission for proper, secure mounting. Check for possible leaks.
– Battery: inspect battery, battery cables.
– Rear fender: Inspect fender mounting, center stand, saddlebags and saddlebag mounting.
– Primary and secondary drives: Inspect the drive chain condition and adjustment. Inspect the rear sprocket and chain guard. Inspect the outer primary cover hardware and for possible leaks.
– Shift assembly: Test for proper movement and function of tank shift assembly. Check to see if the rocker clutch assembly and linkage are correctly adjusted.
– Coil: Inspect the coil and related wiring. Look at the condition and routing of spark plug wires.
Also inspect:
– Kickstand assembly & function
– Choke condition and function
– Horn assembly & function
– Generator condition and related wiring
– Speedometer and speedo cable
– Petcock assembly and proper function
– Turn on the ignition switch and check for oil and generator indicator lights.
– Inspect headlight and taillight/brake light functions.
*Added note when looking at that Panhead for sale*
1948 – Stand alone year!!
Rigid frame with Springer front end.
1949-1957 – Hydra Glide
Rigid frame with hydraulic front end.
1958 – DuoGlide – Swingarm frame (rear shocks) with hydraulic front end.
More Buyers Guides:
Buying a Harley Knucklehead: What to Look For
Used Harley-Davidson Buyer’s Guide
1984-1999 Harley-Davidson Evolution Buyers Guide
Buy a Used Harley and Make It Your Own Project Videos Here
Hello, I'm Kevin Baas from Baas Metal Craft Vintage Bike Addiction. I'm here with Fix My Hog for an episode on what to look for if you want to buy an old Panhead. Behind me, I have a beautiful, beautiful motorcycle here, 1956 FL Pan. And we're going to go through all the ins and outs. Let's say you want to buy one of these, you're looking at getting on one of these old Harleys.
They're awesome bikes, but there's just a lot of little things you need to know about before you pull the trigger and jump into it. All right, so what we're going to do today, we're going to go through this bike, left and right side, and we're going to kind of start from front and move our way back and just look at what are the things you want to look at if you're gonna purchase a bike like this. There's a lot of online auctions going on, lot of eBay things, a lot of things that you can buy a motorcycle site unseen, and it's really tough if you do that because you don't know exactly what you're getting. Once it shows up, you may have a lot of problems, a lot of issues, a lot of things that you find that weren't disclosed in the sellers listing. So it's always good to be able to get a visual inspection of it, see it up close, touch it, feel it, hear it run, see how things work, and give it a good look over.
So with this bike here, a 1956 Panhead, a little history on them. It's a rigid frame and it's got a hydraulic front end. So bikes have changed through the years, and this one is specific to that rigid frame still. And we're going to look at that and how that's differs from some of the later model stuff. With the hydraulic front end, compared to the early style springer front end there's a little more maintenance involved with that, some fluids and things.
So we're going to get a look at that. So starting with the front of the bike, whenever you get up to a bike that you're thinking about purchasing, you know, you want to make sure that you leave no stone unturned. Every single nut, bolt, part of the bike you want to look at. You really want to make sure that you address any issues right off the bat with the seller and say, "Hey, you know, those tires are wore out, they're going to need to be replaced. Those bearings are bad.
This is loose. That's cracked." Whatever it may be. So start with the front of the bike. Obviously the biggest thing you look at is always tires. What kind of shape are these tires in?
The old Harley tires, they make replicas now that look just like the old vintage ones, which is cool, but some of these old bikes, they came from a barn, maybe they still have those original, original tires and they can be check, dry rotted, and they can be unsafe. So always look at your sidewalls. Look inside the tread pattern, just for any cracks, anything. If you can see cracks, you know these tires are probably gonna need to be replaced. If you don't see any, like this one here I can tell is a real good shape.
There's no cracks at all, no excessive wear, it hasn't hit any curbs, which is always something you want to look for. Then you look at your actual tread depth, okay? You should have a good quarter inch thick lug in there to be a good usable tire. You also want to look at tire pressure. Did they run a tire too low?
Which causes the center of it to kind of cup in and cause excessive wear on the outside. Or they run the tire pressure too high, which will run the middle down low. In this case, this looks like they've got good tire pressure. Your middle four lugs are all good. It looks like they're hitting the ground with good contact.
So that's good. Then you want to look at your front end itself, as far as the wheel in the hydraulic front end. Now these are drum brakes, so there is no fluids in these. You don't bleed these brakes. These are mechanical drum brake systems.
You need to understand that mechanical drum brakes, they do work, but they're not like your newer hydraulic style, rotors and sprockets and things like that that really can grab good. So you really want to get inside, look at this stuff, make sure your brake shoes are all in good shape. Make sure things function. I always like to grab levers and just pull on them. Like in this case, I pull on my front brake lever just to make sure that it's actually popping back.
Some of these bikes, if they've been sitting for a long time, moisture can get in there, it starts to rust things up. So if you pull on a front brake and it's just hard to pull in or it pulls in and it doesn't snap back out, that means we could have some corrosion or some damage inside that needs to be addressed. This one here is functioning well, I can feel that it's pulling in nice and smooth and it's releasing well. So that's good news. Your star hub, this is a star hub style front wheel.
It does not have newer style Timken bearings and this has the old style roller needle bearings in it. So these do need a little more attention and service work. They do wear out. They're not as long-term reliable as the Timken bearings are nowadays. But they do, if they're serviced and they're kept lubed properly, they will last and they're nothing that you really have to worry about.
Looking at your brake lugs. There's some lug nuts on here to hold your brake drum to the actual star hub. Always check those. I've seen bikes with some of them missing, some of them broken. And that's a big red flag that this bike might've been ridden hard or not maintained well, if you see stuff like that gone.
Are spokes themselves in the rim? We want to make sure our spokes are all tight. Old bikes have a tendency, I've seen them, where to spokes are either broken off or they're corroded or they're ready to fall off or break off or they're just loose, okay? And in this case, you know, you want to check all your spokes, give them a visual look, make sure that the nipples on the end of the spokes are tight, nothing's loose. If you take your fingers and run across them and you feel anything wiggling, you know you got a problem.
Another way to check that is to take some sort of a metal object and just tap them. You should hear kind of a nice ting. If you hear a dull thud, that's going to tell you that, "Hey, there's something wrong." It's either loose or it could be broken. Sometimes the threads are wore out. So it looks like it's tight but you could grab it it wiggles.
But these all sound good. They look good in the wheel. I can tell that it's all snugged up real good and tight. So going after, the next step then, we'd look up a little higher here into our front end, our fork. Now this is a hydraulic front end system, so it does have fork oil in it now.
They did the hydraulic front ends on Panheads starting in '48 or, excuse me, '49. '48, the first year of the Pan, but only year with springer front end. In '49, they went to the hydraulic front end. They called it a hydro glide. And these are a newer style system now, as far as they have the fluids inside, there's gaskets, there's seals, and all that stuff.
So these need a little more love. Biggest thing on this you want to look for, if you see oil coming down, the fork legs, you know, cause there's a seal would be up inside, as the oil would leak, it could come down through and you'd see it dripping down off the front end. These are both clean, they look good, nothing on there, and everything looks like it's in good shape. You wanna always look for any damage. Has the bike been tipped over?
Is there any chips, dings, any scratch marks? Sometimes these aluminum lower legs could have damage where it actually gets so thin or wore out that you could spring a leak. And those look good as well. And then we look at our fender, our front fender mounts off those lower legs. Make sure that your tabs look good.
The threads look good. Your screws are in tight, your bolts are tight, so that nothing's loose. You don't want this front fender coming loose on you when you're going down a road and it'll lock you up. Check your axle, make sure all your axle bolts are tight so that your axle is not going to be loose or sloppy. That your wheel spacers are in correctly, the wheel is down the center of the bike.
These are just little visual cues that can tell you a lot about a bike. Cause sometimes bikes are put together with mismatched parts and whether or not the builder knew what they were doing could make a big difference. Sometimes stuff's just slapped together to make a quick sale and it doesn't really work, it's not made to be on there. So visually look and see, if there's anything bring a red flag, doesn't look right, just doesn't seem to fit right. Is there something wrong or is there some slop in it?
But if you can see everything's good and tight like this one, you know it's probably been good. And, you know, this has been a restored motorcycle, so that means it's been taken apart, everything's been gone through and it's been repainted, and kind of put back together polished, ready to go as a show bike. Now, usually when that happens, when someone goes through this much work, you know they did a good job, but, again, it's the reputation of who built it. Sometimes nobody knows. And maybe it was a restoration from 20 years ago and the person who did it can't be found.
So you always want to just trust your own judgment, look through it, and make sure it was done right. Moving up a little higher on the front end now. I always like checking out what kind of accessories and headlights they have. And you can tell by original ones, they'll have the guide marks on them. That shows me that these are original lights and a lot of original pieces on this bike, which is a good thing, that adds more value to the bike overall.
I can tell that some wiring has been redone. This is a cloth style replica of old wiring, but it's new. So that's good to know that the wiring was gone through. A big issue with old bikes, when they sit the wiring gets hard, it gets dried out, mice could have gotten in to wherever it was stored, chewed on stuff. Good wiring is essential to a bike to run great.
So you always want to verify that this bike is going to have good wiring from front to back. And I will go through and I'll check and I'll look. Anywhere there could be a rub spot, any kind of metal where there's an edge, it's actually sharp edges on a lot of this stuff, just the way it is. If you have a piece of wire and vibration, it's rubbing back and forth, and these vibrate a lot, it will eventually wear through that sheathing and short out on you. So I like double checking, looking that there's no pinch points, and making sure that my wires don't have any excessive wear or rub marks on them where they're touching metal and just verify that you're good, solid connection there.
Because if it started to rub once, it's going to keep rubbing and it's going to short out and leave you stranded on the side of the road. So going up to the handlebars, we have our risers here in our bars, make sure that your risers are tight. Everything in there looks good. You always want to inspect for any stripped threads. The biggest no-no on a bike like this would be to have some stripped threads here and the nuts can't go all the way tight.
Because you don't want your handlebars coming loose on you when you're going down a road. And I've seen it happen, and it's scary. You got to grab risers and try to come to a stop without crashing. So verify everything's tight and snug, nothing seems to be loose there. And all your front end parts are in good order.
Once you verify the front ends good and you kind of went through it all, you checked that off, now you can move on a little further back and we can get into where we actually see the frame now and how the frame and the front end work together. You can see here where our steering neck is. We still have the original neck lock in there which is great. Everything here, the steering dampener, it looks like it's in good shape. This frame is in real good shape.
And we're going to do a visual going back as we move. The split gas tanks, make sure your gas tank mounts are tight, down here. I've seen these tabs on the gas tanks actually break off. If these aren't shim properly or there's any kind of discrepancy in how they sit, you can have the metal of the actual tabs of the tank break off on you while you're going down a road and the whole tank starts to shake, which is going to cause more cracks and leaks. Also looking at our tank mounts there, those look good, they're intact.
It looks like it's in good shape with no cracks. We got our crash bar here that's been mounted. We've got good mounts there that are on tight. Foot boards are solid. Looking at the motor itself, once we get to the motor part, this is probably one of the most key, crucial points of buying an old Harley.
Is make sure that the motor's correct. Make sure the motor's in good shape. That's your biggest expense. If you have to pull the motor to get it repaired, if there's any case cracks or things that are wrong, or if you start it and hear it run and its clanking really loud or there's problems, that's going to be the big bucks to get fixed. Lot of this other stuff you can fix fairly inexpensively and by yourself.
But for this kind of a bike with this motor, these are, you know, they're old motors and it takes a trained technician guy that will actually work on them and know what he's doing. It's going to cost you money. So you want to visually look at your motor, any cracks, any leaks, look for anything that could be seeping out. Sometimes it's easy fixes, just like a push rod tube maybe leaking some gas. Tappet block leaking where you can just replace some gaskets.
But if you see any actual cracks or visual cues that the motor's compromised, or if there's any welds from a previous repair, now you've got bigger issues that you got to worry about. This one looks good overall down here. Looks like we could maybe use a valve cover gasket up here, a little bit of leakage coming down, possibly a push rod tube gasket there. And otherwise, fins, check your fins of your motor. These aluminum fins.
They can get chipped and broke with the motor's been taken apart and in and out. You want to make sure that those are all in good shape. If you see a lot of broken fins, they usually don't get broke from being in the motor. They get broke because they're off the motor and something's happened, they've been dropped or something hit them. So if you see a lot of broken fins, that's got to tell you well the heads probably were off this bike for some reason.
Now you got to wonder why and what was going on and what was repaired? Are there any internal repairs that we can't see? So you really want to give that a good idea of what to look for on those motors when you're going through it. And, okay, going to the exhaust. I like looking at exhaust mount points.
Always make sure your exhaust is tight, screwed in good. And nothing wrong there. Our brakes, brake system, another one of the real important parts of your bike. You want to make sure that your brakes are functioning fine. We checked our front brake, pulled the lever, everything was good there.
You want to check your rear brake, make sure that the brake lever actuates good. That it snaps back good, it's not binding up. And again, this is a mechanical style brakes. So there is no brake fluid on this, there's nothing here that you need to worry about as far as hydraulic system to bleed out, no brake fluid, it's all mechanical. So as you hit this lever, it pulls on this crossover shaft, which pulls on another lever, and it'll actuate your brake.
So that's looking good. Our brake switch here, check your wiring on that stuff. Make sure there's no wires that could rubber or short out. They are close in certain areas where they get compromised just from vibration. Cause, again, these bikes do vibrate a lot.
So always check your wiring from front to back as you go through. Looking for just little stock mounts here, little tabs that hold wiring in place. Always good to see that. To see that somebody brought the time to do it right, rather than just running a bunch of wires loose in a big rat's nest. So that's looks good.
Brakes seem to work good. Oil pump looks good on the motor. Looking for leaks again, any kind of seepage. Nothing there, so that looks good and solid. Checking our oil lines, now, moving back a little further to our oil tank now.
How our oil system works. We've got our feed line, comes down here in the back, underneath to the oil pump in the bottom. And then we got our return line and a vent line both coming off. The vent here, you can see that one as the top one coming up through there, and there's our return line down there, and our feed line is even lower down below. So those look good, I don't see any excessive leaking there that would show me that maybe we have a bad fitting or needing to have any addressed oil leakage issues there.
Looking at the oil tank itself, making sure that that's solid. If the oil tank starts to loosen up and start to wiggle, you're going to get cracks and then you'll be leaking oil everywhere. This one looks like it's in great shape. Everything's solid and tight. Underneath looking at all the lock nuts are on, everything looks good.
Our transmission, checking for leaks again there. And leaks are a big part of this point because you want to see if there's any fluids on the bike, that could be a potential issue. And, again, cracks, problems, gaskets need to replace, wore out shafts, you name it. So always look for those leaks, that's a big sign of something that may need to be fixed. This bike here, overall, is real clean and it doesn't have a lot of leaks, so that's a good thing.
So that tells me, you know, if it's running good and it's not leaking a lot, we know we got a good solid foundation on the bike. Looking at our transmission mounts, there's a fifth transmission mount here, make sure that the frame looks good there, it's not cracked, and that bolts in tight. Our trany plate's down nice and tight. Our adjuster looks good. Our oil line, this steel oil line runs underneath in front of that fifth transmission mount.
If it's touching it will vibrate and wear through, so make sure you got clearance under that kind of stuff. And this just long-term stuff from a bike that you know you're going to ride. You don't want to get on a road and it'd be on a 2000 mile bike trip in the middle of nowhere and all of a sudden this oil line springs a leak, cause it's going to be hard to find a shop that would probably have that stuff. So keep an eye on that. Look at things for long-term like, "Hey, could that wear out eventually?
Is that touching the spot where it could rub through?" And just make that note to yourself. Like, "Hey, before I leave on a trip, I want to check that kind of stuff and make sure we're in good shape so that we can get all the way where we're going and all the way back and not have to get a trailer." So that looks good there. Then going back towards our rear, we've got another crash bar here, a rear crash bar. Everything's tight. Our batteries inside the oil tank here, so we got this battery cover on here.
We'll want to take off and inspect our wires, make sure the battery looks good, make sure our circuit breakers and all of our wiring is in good shape. Always with wiring check for, again, frayed wires, rubbed wires, anything that could short out and burnt wires. If you see a burnt wire, you know something has shorted out or is shorting out and that's going to be a big, big red flag for an issue that you need to find and address or it's going to leave you stranded. Going on to the rear fender, making sure the rear fender is bolted tight and it does go to the oil tank here and then the frame up top. And then coming down here, we're looking at where exhaust pipe bolts on, our bracket, our crash bar.
We got our center stand, so we could actually flip the center stand down to lift the bike up to change a tire on the side of the road if need be. Get our cheese grater bumper here. Headlight or tail light, license plate, saddlebag mounts, all that stuff. We just want to just give it a quick visual, make sure nothing's been cracked, nothing's coming loose. And look at the quality, you know, on old bikes a set of original Harley-Davidson saddlebags like these are really hard to come by.
And, you know, to find a set that's in good shape, it's going to cost a lot of money, so if you do have a set that are pretty good, this has a little bit of a wear mark here and a little bit of some age to it, but these are in really good shape. Just, you know, kind of keep track of that too, and understand you're going to need some leather maintenance on some of this stuff. You're going to want to be able to put a balm on it or some sort of a leather dressing to keep these nice and soft and supple and not let them get dried out and cracked and fall apart on you. And, then coming to the backside again, going down, just looking at the rear tire, same thing like we did in the front. Do we see any check marks, any cracks, any dry rot, any excessive wear?
This looks good, this tires in great shape. Our tread pattern depth, real good. Our wear looks good, so the tire pressure's been run correctly. Our spokes again, we want to get in there and get a look at spokes. If you see any that are rubbed or wrong or loose or cracked or broken.
Our rear drum brake lugs, make sure those are intact and tight. And then checking our rear spacer, the star hub, and all the rivets on the sprocket there that hold the chain in place. Everything looks tight, everything looks good. So, looking at this bike from this side, there's no real red flags on this one. I would say if I saw this and I was going to buy it and I went through what I just did, I would feel pretty confident, just from my first visual inspection before I heard it run, that this bike was built and done and done correctly.
Things were put together the way they should be, the person who worked on and restored it knew what they were doing, used the right parts, put them together the right way and I would trust it. So, now what we're going to do is flip the bike around. We'll come back and take a look at the other side. All right, so we got the bike turn around. We're going to go through this side, kind of do our check of the left side now and see what we can find.
But as you're doing that, you know, and if you find things that are wrong or you're wondering if something's right, it's always good to have your manuals handy. So you do want to have a good service manual. They have the original Panhead style service manual that you can use. They have the Climber style manuals you can use. You've got your Harley-Davidson parts catalogs, looking up different parts.
So have your reference ready. I mean, there's so much out there. If you're building choppers, bobbers, stockers, if you're doing restorations, the books are there. Use them, they help you. It's a good resource to have on hand so that you can answer most questions that you might have if you come across something and you're not quite sure.
So, starting with the backside of this, again, we went through the back right side at the end there. Looking at our left side, again, we have our center stand. Make sure you have a good catch that's tight and holds that up so this doesn't fall down while you're driving. We check tail light, make sure everything's tight. License plate bracket.
All of our bolts here on this side for the bumper cheese grater here are good. You want to make sure nothing's coming loose that could fall apart on you. Your saddlebags, again, saddlebag mounts with your luggage rack, just double checking all of our bolts are tight. And again, the good original, nice clean, two year only saddlebags for this bike in great shape. Keep good track of those.
Keep them well-oiled up so they don't get dried out. Now looking at this side, we're going to see a little bit more than we did from the other side as far as our brake system. The right side, had the actual pedal and we know there was a crossover shaft. Well, what that crossover shaft does is that comes to this side now, to this rod here, and the lever that's on our brake drum. So as I'm...
I'm going to go to the other side and hit the brake pedal, just kind of, you'll be able to see this lever and arm kind of move here. So as I pushed the brake pedal, the cross shaft pulls on that and you'll see your brake being actuated. And, again, you want to make sure that this lever moves smoothly, pops back. That tells us that everything in here, nothing's bound up, nothing's bent, nothing's mechanically wrong. And I'll just take my hand too and push on it just to make sure I can see and feel and get everything kind of going there.
And we'll obviously want to get this up and spin the tires and check the brakes that way too, and make sure they're grabbing good. Then looking at our sprocket, these sprockets are riveted on, so you want to verify that your sprocket is still in good shape. That the teeth aren't wore down excessively and that the rivets didn't come loose. Some of these old drum brake style rear systems, the sprocket actually, from just riding it and wear and tear and the vibration, the little rivets start to come loose and the sprocket gets loose and then it can wear out on you, it can cause excessive wear on the chain and the system and need to be replaced. So that looks good.
We check our chain. With chain, obviously, they stretch. So you're going to always be adjusting your chain as you get a new one on and you put miles on. As they stretch out, you need to loosen up and kind of readjust where you're at and check that you have about three quarters of an inch of play in your chain. If it was really excessively sloppy, we'd want to address that.
The other thing with the chain is there is a tight spot and a loose spot. So if we get this up on a lift and I start rotating that tire, I may find a point where that chain is pretty taunt. You know, it's real tight, thinking "Oh, that might be too loose." But then I keep rotating, now you may have more slop on one side. So there is a tight spot and a loose spot. You want to kind of find a happy medium in that, so you don't have too tight, because if you're too tight you're going to pull on your transmission shaft there and you start leaking.
And if it's too loose, it's going to be slapping around, hitting everything and making all kinds of noise. So that chain looks good. Again, look for any rust or excessive wear. This one's got a good quote oil on it, so it's been serviced and oiled. So the links look good.
If you can take the chain and actually rotate it left to right, up and down, that means the links could be wore out. And this one here is good and solid and feels real nice and tight. Look at your chain guard, make sure to chain guard's tight. You wouldn't want that coming loose and falling down and binding up in there. And here's a good example.
You have Cotter pins that go in for different types of nuts to lock them in place. Make sure that the little wings of the Cotter are actually bent up so that that Cotter pin cannot fall out. Because if they aren't, if they're straight in-line, that can work itself out and then that bolt's going to come loose and fall out. So double check all those and make sure that your Cotter keys looked good. Nothing's broke.
Everything looks like it's adjusted well there. Our primary covered that covers our clutch system here, there's all these screws that hold it on, make sure you're not missing any screws. Sometimes those can vibrate and come loose on you and then that'll cause the cover to start to get loose and rattle, cause problems. That looks good. Always looking at the frame, different mounting points, different areas, make sure everything looks good there.
Oil tanks tight. Our brackets look good. Our castings all look good. Doesn't look like there's many grind marks. Sometimes you'll see the frame tubes here actually dented in cause people have hit curbs or, you know, jumped them over things.
This one here is in good shape, there's no damage there. If you see excessive wear, scratch marks, or dents in the bottom of your frame, you really want to get a good look overall at the structure of the frame because they may have hit something so hard it could have damaged something that's going to come up down a road. This one looks good, solid there. Again, always looking for excessive leakage, any fluids. That looks good.
Our kickstand mounts up here with our foot boards and then our rocker clutch for our clutch mechanism, make sure that's working smoothly. This system is not a suicide system. Some people see the tank shift in that and they'd say, "Oh, that's a suicide clutch." These are not a suicide clutch. A suicide clutch would be one that does not hold itself in the clutch stage. If you let go on the pedal, it would pop back.
These are actually, this is a stock style, rocker clutch, so it's toe to go, when I go toe down, this thing releases my clutch, I'm engaged, I can go. When I heel down, heel pulls the clutch rod here and actually releases the clutch plate. So now we have our clutch action. And it should stay. If it doesn't stay, that's a dangerous thing because sometimes if you're not in neutral and you have it you put your clutch in, but you don't find neutral in time, you have to stand off that clutch and put your foot down so you don't tip.
If you're still in gear and this goes in, it's going to make you lurch forward, okay? So verify that stays where it needs to. There's some friction disks in the backside that can be tightened down if it doesn't seem to snap correctly. This spring here, make sure that's not wore out. Sometimes this little post here starts to get excessive wear from years.
This one looks good, it's solid. Your foot boards, make sure those are mounted good. Underneath the bolts are all tight, nothing's been hitting on the ground. That looks nice. Kickstand return spring looks good.
You don't want your kickstand flopping around down on the ground, so make sure that's going to come back and maintain its spot. Our coil, these coils that are mounted on here, they can either be a six volt or 12 volt systems coil. Always verify your battery, your coil, your electronics are all matched up depending on what some people upgrade, it's to six volt, to 12 volt for just the newer reliability, easier get bulbs, brighter lights, and so forth. But check that the coil's not breaking. Sometimes the mounts on the coil get loose and the coil starts to vibrate and it can actually snap off and fall down and short out.
And then, again, when I talked about wiring here, you can tell this bike has been rewired and they used nice cloth wiring, our connections are soldered, there's shrink wrap. So you can tell, just by seeing that, that somebody did a good job, they took their time. If you find wires that have been replaced, but just maybe crimped on real sloppy, no shrink tubing, no solder, that would be a red flag that if they did it in spots you can see that are easy to get at, the stuff you can't see is probably a real bad bird's nest. So wiring there is looking good. One thing I do see that could be a potential issue though, the spark plug wire here for the front head.
You can see how it's actually tucked under this stainless steel cover. And this has a sharp edge. I can feel that it's a sharp edge already. So this, to me, hopefully I can just pull that out. Yup, and that popped out, but that there is eventually going to wear through that and short out.
So good thing we caught that. The previous owner wouldn't have wanted it to be going down a road and all of a sudden bike stalls out or starts to sputter and wonder why. And if you don't notice that, it could be something where you're troubleshooting things that don't need to be fixed all for some simple little wire that was just rubbing the wrong way. So always check for rubbed wires, wires that are touching metal. Again, I always check anything that's touching anywhere I want to make sure it's not going to run through and short out on me.
Our clutch itself. Again, when I do put my toe to go, you should have just a little bit of play here. You don't want to have this to be bound tight. If this does not get loose and you want, probably a half inch of play is fine on that. But if there's no play here, that means your clutch plates are still being pushed out, if it's tight.
And you don't want that, because that means your clutch is going to slip. When you're trying to kick start, it's going to slip. When you're going down the road, it's going to slip. You want to have that little bit of loose play, which tells me now that my clutch plates are all the way in, making good contact, and they're not going to slip on me. And this style is the rocker clutch, again, we talked about, goes along with a tank shift here.
This is a stock tank shift style bike. So we got one... The shifter pattern is one, neutral, two, three, and four is all the way forward. You'd want to verify that you have good throw first through fourth, make sure that when you're in the neutral spot, that you are truly in neutral, that there's no adjustments needed. If we do need to adjust these, you can adjust them right here.
Undo these bolts, take that lock nut down, and you can turn this in or out to give yourself more throw or play one way or the other. And then check that there's no loose sloppiness in the arm or the lever coming down. Where it goes to your lid on your transmission, make sure that's tight, no slop there, no excessive oils or leaking. Looking at our motor here, as long as we're in this area, I check my VIN pad, make sure that motor mounts are tight, there's no cracks on that. And then we got our actual VIN pad on the motor here, the boss that tells us what year this motor is, what model it is.
In this case, this one here is a '56 FL. And FL means it's a 74 inch. And another good thing, and this is something that some people don't see, but when you get an old bike like this, the FLs will have a seven stamped in the rear by the engine mounts here. If you have a '56 FL and there's no sevens on those number pads there, that means that it wasn't truly an FL case to start, somebody put numbers in an EL case or a replacement case, or there's something going on in there. So that's a little thing that you really want to look at.
And that's where, when you're restoring a bike or you buy a bike and you think you've got what you have, make sure you check those little details because that's stuff that can slip by you and you won't know it until it's too late and say, "Oh no, I didn't realized the motor was not an original motor for this bike." So this has both sevens on it, so that's good. Again, '56 FL, 74 cubic inch, looks good. As we said before, we check our fins for any damage, cracks, break, marks there, any dings, because of this motor was apart and those heads were off and some fins got chipped, then you gotta wonder why was it apart in the first place? What did they fix? What was wrong internally?
These heads are in great shape, no cracks, no repairs. Spark plugs, make sure that you got no cracks in your spark plug holes there were those go in and the spark plugs are tight. Your spark plug wires are on tight. Checking our choke from this side. Make sure the choke functions properly, doesn't bind up.
That looks good. We got our stock horn here. Horn bolts to the head up here. That looks good. Our horn mount's great, good shape.
There's a little rubber gasket here that looks good. Those can get wore out and dried and crack. Generator, checking our wires off for a generator, again. And again, I keep seeing that these wires have been replaced with really good quality wires, good original style cloth covered, done correctly. So that's always a good sign.
It makes you feel good knowing somebody, if they put that much time into the wiring, then hopefully they did a good job on everything that they touched on this bike. Stock generator on this one looks good. Speedometer or speedometer cable, make sure that's tight. Those can come loose down there off the transmission. And that looks good there.
Going up through. Our gas line and our crossover, make sure those are in good shape. Again, a gas line's another one you want to check. Is it rubbing on anything? Sometimes these can get bent in and touch a fin and they'll start to rub through.
You don't want any gas lines getting compromised and actually springing a leak can cause fires or problems down the road. So that looks good. Our petcock on this side, is there a fuel shutoff built into the tank? Make sure that actuates properly, loosens up, and turns on and off. With our wiring stuff, again, just turn the key switch.
Make sure you got lights, in this case you should see a generator and oil light before the bike's running. Once the bike starts up, you should get oil pressure and generator output that'll cause those lights then to shutoff to tell you that everything's fine. If you're driving down a road and the bike's running, all of a sudden you see the oil light come on, that's a red flag, shut the bike off, check your oil, there's a problem. Or same thing with generator, means you're losing power. So that looks good, functions well.
Speedometer, we've got a good stock speedo on there. And then looking down at our front brake, we've got our brake cable coming down, again, mechanical front brake. Pull the lever, make sure it works. We do have an adjustment right here to adjust our brake if it's binding up or it's not grabbing good enough. And then, again, with any last nuts, bolts, axles.
We've got our Cotter key in there nice. So that shows us that that was installed correctly, not going to come loose. And then looking at, just the last minute, of all of our wires, again, just visually. Do I see any wires that could rub anywhere? And everything looks good.
So that's pretty much what you would look for just off the get go of a bike like this. And what you got to remember about this is that the Panheads, there's a bunch of different changes that happened through the Panhead era. You know, the Knucklehead era, you basically had a rigid frame, springer front end the whole time. Panheads, they changed through the years. So 1948 Panhead was a rigid frame with a springer front end, basically it looked like a '47 Knuckle, but with a Panhead motor in it.
A couple minor changes on some gas tank stuff and things. But a lot of it was similar. But in '48, that was a one-year only style Panhead. So if you want to get a springer sprung stock '48 Panhead, they're going to cost a lot of money because they were one-year only, they're a lot more rare, they're really sought after. Getting into the year after that, '49, when they went with the hydro glide front end, so '49 to '57 was still a rigid frame Panhead with the hydro glide front end.
And big bunch of years there, a lot of them that you can pick up, some changes in some badges and different things like that, but, for the most part, all real similar bikes. And then in '58, they went to the swing arm rear end, they call it the duo glide. So now it had an actual hydraulic system in the rear with shocks, hydraulic front end, and a duo glide. So when you're looking at these kinds of bikes that's what you really want to think about too. What are you looking for?
If you're buying a complete restored bike, just make sure the numbers match. If it's a '56, it should be a rigid frame, should be a hydraulic front end. If it's not, now you've got to wonder, "Well, what's what's going on here? Was this just a swap meet special or was something wrong and did they get in an accident and have to re replace the front end or the rear end or whatever it may be with something that wasn't truly correct for the era?" So keep that in mind. You know, there's a price tag to everything.
The older you go is usually more expensive. The newer you go, they made more of them, they're easier to get, technically, but any Knuckle, Pan, early Shovelheads, the prices are going up because they are just getting harder and harder to find. Harder to find original ones, original paint ones, stock ones. What you may find in a lot of times now, in this day and age, people are looking for just a starter bike. And if you look to my right here, this is your basic bare bones kind of chopper Panhead.
Now this one here is going to be something that I'm going to be putting back together. I built it years ago and it's kind of a mismatch of parts. So, the frame is actually a '57 frame. So it's the last year to straight leg rigid. But the front end you'll notice is a springer, okay?
So not correct to that frame. This is actually a Knucklehead springer, was put on the bike just because at the time that's what we had. And then the motor, this is actually a '58 motors. So this motor should go in a duo glide, not a '57 straight leg rigid like this. So, again, it's a mismatch of parts.
For a chopper like this, I'm fine with that. I have no issues putting it together like this and just riding it. If I want to restore this bike though, to look like this beauty here. Now I got to look at there's a lot of things that are going to be going on that I have to address. It's going to cost a lot of money.
The frame has been compromised, there's things cut, taken off, so stock tanks won't mount normal anymore. Just a lot of little things. So if you're looking for eventually a restored stock style bike, and you're going to start with a chopper, do your math, you know, look at what's going to cost. Do your research on the years of parts you have. What do I have here?
Maybe and sell this Knucklehead springer front end for pretty good money and be able to buy the hydraulic front end and maybe some other parts, you know? So look at what you have and what you can maybe swap or sell to kind of buy what you need. But you do want to look at, is it getting even going to be possible? You know, this frame has had so many cuts and chops to it that it's going to cost a lot of money to get it back to stock, it's going to take a lot of time. If I want to go with this motor into a stock bike, then I need to find that swing arm, duo glide style.
And again, if you're piecing it together one piece at a time, trying to make a stock one starting with basically nothing, you're going to have a lot of money invested. And it costs a lot of money to buy one that's already done as well. Some people like that, you know, the chase of finding those parts. They have time, they're not in a rush. They want to just slowly piece stuff together as they find it at swap meets.
But in this day and age, the swap meets are getting harder and harder to find the parts you need that aren't super expensive. And just the real original stuff is hard to come by. Yeah, there's a lot of repop parts. You could rebuild this whole bike with all repop parts, just using like the frame and the motor and the transmission, but a reproduction bike is not nearly as valuable as the original OEM style restoration bike. Just the aftermarket made parts, they're not the quality that the original Harley stuff had on them.
And it just, there's no value to it because it's just, you can buy 20 of them that were made overseas, put the parts on. But if you find the original stuff, you know, guide spotlights and things like that. Just the little pieces, original emblems, original horn, all those little pieces that really make a bike a collector and valuable and it's only going to go up in value at that point. A reproduction bike made from repop parts will never gain the value like original OEM one will. It just won't.
So keep that in mind. Some people don't care, they just want one that's going to look nice. They're not looking to resell down the road. They're not putting it in AMA shows. They just want to ride it and have something that looks cool.
And then that's fine. So it's all about you. It's your bike, make it your own, do it your way. Be happy with it. But again, do the research.
Just know what you're doing before you start, because you don't want to jump off a cliff and realize you don't have a parachute, all right? So, with that, we're going to end here and just start getting into the nuts and bolts of the internal stuff and service work.
A beautiful bike from my birth year. Video is well done and very informative. Thanks I loved it!