Buying a Harley Knucklehead: What to Look For
Kevin Baas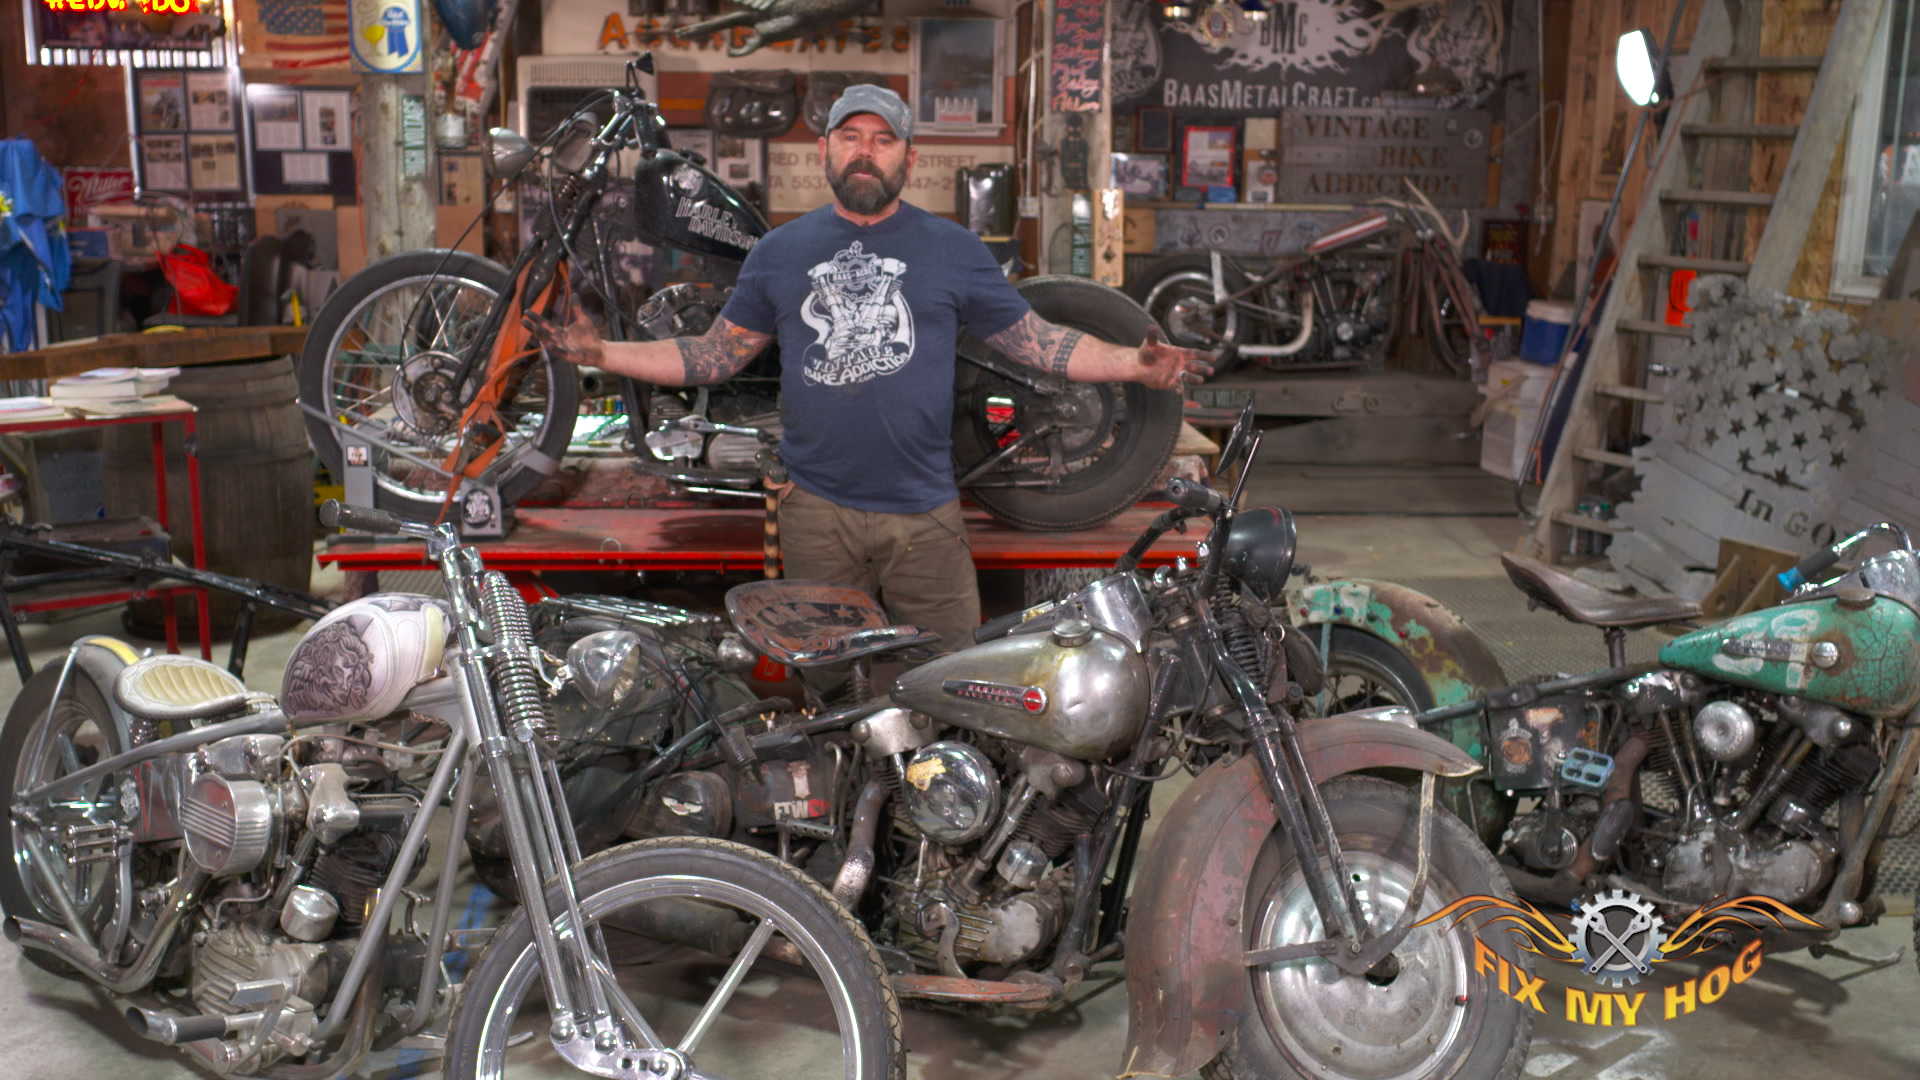
Video Player is loading.
Fix My Hog is excited to be working with Kevin Baas, who has a deep knowledge and an enormous amount of experience with Harley Knucklehead motorcycles.
In this video, Kevin discusses what to look for and what questions to ask when looking to purchase a vintage Harley Knucklehead motorcycle. This is the first in a series of videos where Kevin walks us through the inspection and repair of a Harley Knucklehead bike. This motorcycle is actually a Knucklehead engine inside of a Harley Panhead frame.
ENGINE & FRAME
Kevin explains how to decode the engine’s VIN number which is the only manufacturer’s number that exists on a Harley of this age. There are no VIN numbers that can be found on the frame or transmission. The 1st two numbers in the vin represent the year. This lists this motor as manufactured in the year 1947. This would be the last year of production for the Harley Knucklehead engine.
Visually, Kevin can determine that the motorcycle’s frame is a later, Panhead frame. The stock Harley Knucklehead frame would be a “straight leg” style frame. The frame for this motorcycle is “wishbone” style. Both the Knucklehead engine and the Panhead frame have considerable value. Assembled with the correct corresponding (year) counterparts parts, they can become even more valuable.
It is important to inspect frame damage or frame modifications. Inspect motor mounts for damage or possible cracking. Visually inspect the motor for any major signs of damage or leaks. Make sure there are no broken fins on the heads or cylinders. If you detect a leak, try to assess if it is from simple gasket failure or originating from a cracked case.
WHEELS & BRAKES
Inspect the front and rear wheels, hubs and spokes.
Inspect the drum brake assemblies for missing, broken or damaged hardware.
FRONT END
Springer front end assemblies are excellent when regularly serviced and maintained. Visually inspect for anything that may look incomplete, bent, or altered. Springer front ends also have a lot of value. If only looking to purchase a Springer front end, you will have to shell out a pretty penny.
ELECTRICAL SYSTEM
The original Harley Knucklehead electrical system for this motorcycle would have been a 6 volt system with a magneto and with no battery. This motorcycle has been updated to a 12 volt system but still utilizes the magneto along with a generator. If the motorcycle had a battery, it would also be important to inspect the charging system.
TRANSMISSION & DRIVE & GEAR SELECTOR
Inspect the transmission for any visible signs of damage or excessive leaking. Cycle the kicker arm to verify that there is no binding. Make sure you can easily shift through all (in this case) four gears and that you can easily find neutral. Inspect for proper clutch function and feel. The Harley Knucklehead in this video was originally equipped with a rocker (foot) clutch lever with a jockey shift arm. It has been updated to a more modern hand clutch with a foot shift assembly.
FUEL SYSTEM
Inspect the fuel system from the fuel tank to the intake. Inspect and identify everything in between. What is being used for a carburetor or for a petcock? Determine if the fuel tanks are stock, aftermarket, or from a different model year Harley-Davidson.
OIL TANK/OIL SYSTEM
Inspect to see if the oil tank is original or aftermarket. Inspect for any possible damage.
HANDLEBARS & CONTROLS
Handlebars are often changed and no longer original. They are easily replaced. However, it is important to determine if handlebar controls have been altered or updated. The stock throttle assembly for a 1947 Harley Knucklehead would have a push/pull, hard cable assembly. It might also have an ignition timing control on the left side.
Look for these components or identify the absence of the two. The motorcycle in this video has an updated throttle control. It works fine but decreases the valve of this vintage motorcycle.
Kevin stresses the importance of utilizing reference materials. Service manuals, parts manuals and other publications are easily accessible. It is always possible to figure out the correct parts or repair procedures for a vintage, American Harley-Davidson.
More videos to help with your Used Harley Hunt:
Panhead for Sale: Buyer’s Guide
Used Harley-Davidson Buyer’s Guide
1984-1999 Harley-Davidson Evolution Buyers Guide
Buy a Used Harley and Make It Your Own Project Videos Here
Hi my name's Kevin Baas, from Baas Metal Craft Vintage Bike Addiction. I'm here to show you a video for "Fix My Hog" on what it takes if you wanna get into an old Harley. So, behind me I'm gonna be showing you an old vintage motorcycle. And technically speaking here, this is a Harley Davidson knucklehead motor. Knucklehead motors were made from '36 to '47.
There's different variations of bikes, old school choppers and pans, shovels into the new stuff. But we're gonna focus on the knucklehead today and show you just what it takes if you're at a swap meet and you wanna look for a bike like this. And it could have a panhead motor or shovel that's not a big deal but what we wanna look at is the overall, what do you look for? What are the things that are red flags? What are the things that you wanna really take in consideration before you write that check?
Because if you buy a bike sight unseen or just looking at it real quick and yeah here you go and then you get a home, he started getting into it, you may find a lot of issues and stuff's expensive to fix, it's not safe if it's not done right. So we're gonna walk through this thing and just show you what would you look for, what's gonna be a red flag and what it takes to have a bike that you can trust. So again, looking at this bike a 1947, Harley Davidson knucklehead we're gonna start with the front and work our way back. So basic stuff to look at right away off the front of this bike is we wanna look at the front wheel. Now this is a 21 inch front wheel which is an aftermarket more of a custom accessory to these bikes.
They would normally have like a 16 inch or an 18 inch wheel. But the size of the wheel only just really changed the way it looks. They handled pretty much the same. What we wanna look at here is the front hub. Okay?
These hubs are old school style they call it a star hub wheel. And that means that this is a mechanical drum brake. Mechanical drum brake means there's no hydraulic system in this. There's no disc pads this is a drum, old school drum okay? So that's something to think about because the reliability and the stopping power of these is not that great.
You can get them to work well but you gotta make sure you service them, you keep up with them and you know what to do to make them work right. If you don't you're not gonna be able to stop when somebody pulls out in front of you. So mechanical drum front brake, star hub, you know non-Timken bearings these are old roller bearings in there so you know again, the technology is older it needs more maintenance, you gotta keep up on it. Looking at the front end itself. This is a Springer front end okay?
And Springer front ends were used on these old Harleys and knuckleheads up until the first pan in 1948 it was a still a springer front end before they went to hydraulic. Now a springer front end, if set up correctly again, they, I think they handle fine, they work great. But some people, you know you get into that little Pogo, you're are going around turns it gives a little wishy-washy to you. It could be something you wanna think about you know, you gotta be ready to really handle the bike learn the bike, know the bike, know how to maintenance it with all the different grease zerks, how to adjust settings, make the spring tension tighter or looser, if you wanna put a shock on it that was an accessory for those you can do that. So springer front end bearings inside the neck looking at the frame.
So when you walk up to a swap meet let's say you see this bike for sale, you know right away my visual eyes, we're gonna catch that. And that's the old neck lock. And you can see now the neck lock's missing. It should be a key tumbler in there, but I can also tell there's been welding done around it. So it almost looks like somebody had it gone and messed it up and then they tried to weld it up and we're gonna fix it maybe try to repair it, to get it back to working order, well they didn't finish the job.
So a frame like this, if I looked at I'd noticed that right away and I'd be telling myself, well I'm gonna either have to machine this myself get it to work or hire a machine shop to do the work for me, which can get very expensive. So keep that in mind. I'm gonna kind of cover the whole frame real quick now that we're on that topic. But another thing right here there should be a crossbar that comes across here. That bar is missing okay?
That tells me that this frame has been chopped, cut, potentially it could have been raked more back in the day we don't know, but that's a red flag now because if that's gone, now we're losing structural stability on this backbone which could be cracked, there could be some issues that we need to really look at 'cause you don't want this to break off when you're going on the road and cause an accident I can tell the top motor mount's been modified. Okay, there's some changes there. Sidecar loops and these frames had sidecar loops to run an optional sidecar on. This still has them, which is a good thing. A lot of the old Harley frames on the choppers and bobbers.
these get cut off the guys thought it was cool to cut them off and just move the front, nowadays, these frames are worth a lot of money if they have stock stuff like that on them. So that's good to see, that's got the sidecar loops. Foot boards mounted in, it looks like our stock mounts are all good and correct. And then walk them through a motor mount like I say had some repairs and I can see right here underneath there's like a piece of angle iron welded on here. So again with that crossbar being gone, that's telling me, hey this frame probably cracked.
When I get this tank off there's probably some welds, repairs, cracks, something's wrong that shouldn't be there. And that would be a huge red flag. So if this bike had a huge price tag on it I'd be telling the seller like you know, this is something that I need to look at a little closer before I'm gonna pull the trigger on buying this bike. Going back a little further here where the seat mounts, these typically would have had a seat post going in. This one you can see has a hinge pivot just for a little solo seat but there's a seat post tube right here where a seat pogo would go in for a Pogoseat.
And I'll show you some examples of how that works on a stock bike in a little while, but for now again we'll just keep addressing this. So I know I'm looking at the frame I can see they dented the frame tube in to fit this motor. That's another red flag and looking at serial numbers I can tell but that tells me and looking at this wishbone front end that this is not a true knucklehead frame this is actually a panhead frame. And I'm pretty sure from looking at it it's a '48 panhead frame. So to get this knucklehead motor to fit you can see they had to do a little beating on that down tube which means now that pogo won't fit.
It's not gonna slide down in there and work until I take this post and straighten that out. And in this case, if I did that then the motor is gonna hit so it's not gonna work. So this bike obviously is a chopper of different pieces, different years and that's what you find a lot nowadays. Guys are going through their barn finding parts here and there and just building the bike take it to the swap meet and sell it. And if you don't look closely, you don't take the time, you could buy something that's not gonna be worth the money and just be a big can of worms it's gonna cost you a lot more headache in the long run.
So go on back from that, I can see here they had some bungs welded in the frame those are not stock so they must have had at one time like a sprung seat on here with some springs. I bet you the spring perches were on that. And then going to the back here are a toolbox mount there should be a toolbox mount here that's missing. Axle plates look pretty good. There is a little bit aware on a plates there but otherwise they look nice.
And then going to the back of the bike here, again drum rear brake star hub wheel. This is the 16 inch tire which would be more stock on these bikes. And again, just remember reliability for stopping power it's not the same with the drum brakes, be safe, be smart think about yourself when you're on this bike, can you handle it? All right? Safety is the number one priority when you look at an old bike like this and that's why we're gonna go through it today and show you everything and make sure you understand it.
And looking at this side now we've pretty much got that covered from the frame now we'll look at the motor itself. So obviously just a visual inspection of this motor tells me a big story already. I can tell this bike's been ridden, there's oil everywhere. This thing's leaking oil from the heads, the push rod tubes, the return line, there's oil everywhere on this thing. So at least we know we've got good oil pressure and it's got oil in it 'cause it's leaking.
But that can also tell you there could be problems, are there cracks? Do we need to replace gaskets? Why is it leaking oil? Now these old cast engines that everything was cast in a foundry so they're a little more porous than today's technology on a machined, you know aircraft aluminum or whatever it is. So they do have a tendency to weep and leak a little bit.
But excessive leaking, that's a red flag, what's going on? If there's a crack case, ooh, you got big trouble. So looking at this knucklehead motor I can see a lot of oil. We got, it looks like our head gasket's leaking, our base gasket's leaking, our tapered blocks are leaking, our return line's leaking, this one's gonna need a lot of love if I wanna actually make it a good reliable rider and not worry about it leaking oil all over the place. Another problem with bikes that leak oil and the old joke with Harley guys is well it's marking it's spot, or if it doesn't leak anymore it's out of oil.
You know that's great and all that but when they leak too much, there's a problem, you need to address it, get it fixed. So we'll look at that try to figure out what's going on. The other thing, electrical system on this bike. You may see this, some of you may have noticed it some maybe not but this is a magneto so this is a self-contained ignition system. This bike does not have a battery.
Normally there'd be a battery in the battery box and wiring for all that. When you run a magneto like this, this is a self-contained system. So as soon as you kick the bike and the motor turns over there's a gear here that spins and it starts to create its own spark so you don't need a battery. What I like about magnetos is that electrical systems are usually the biggest problem on an old bike. Whenever I see guys broken down, I stop to talk to them it's nine times out of electrical system and there's something shorted out, something rubbed.
What's great about a magneto is this thing's gonna run if your tail light and headlight and everything's all shorted out, it's still gonna run. This magneto is going to give you spark to get you home. You may have to tape a headlight or a flashlight or something as a headlight but it'll run. So wiring is real simple on a bike like this, which some people like that. And I do myself, I do enjoy it because there's no wires other than the plug wires, there's a kill switch right here to kill the ignition and then these bikes run on a generator which I'll have some time to turn the bike around we'll go over the other side and I'll show you that.
Exhaust pipes on this bike, looking at the exhaust. We've got some stock two into one style exhaust which is nice. The only difference here is they took the stock muffler and put more of a customer race muffler on there a little shorter stainless one. But this kind of an exhaust if you can find the original exhaust on a bike it's actually they're worth a lot of money because a lot of the aftermarket, newer repop ones don't fit as well as the original. Back in the day the original stuff always fit really good.
So keep that in mind what kind of exhaust do we have on this thing? We're looking at the leaks, with looking at our electrical system and you know make sure that you're already, you know you even have a notepad, write down the things you're finding and talk to people. Call a vintage bike shop, let them know what you found, give them some of those details and I'm sure they'll lend a hand to let you know what it might cost to fix. So you can tell yourself like, whoa okay, I'm buying it for this much but now it's gonna cost this much to make it right, do I wanna do it? You know be smart.
Looking back at the transmission. These bikes had four speed, kick only transmissions on them okay? A little pig snout cover here the kicker, you wanna make sure your bushings are tight, things work good, it shouldn't bind when you kick it should come back nice. And this is again with all that oil I can't really see what's going on with this transmission case. So I'm gonna take this thing apart and I'm gonna clean everything so I can get a good look at it to make sure and visually inspected that there's no cracks, no repairs.
A lot of these old transmissions have had busts and cracks back in the day. They've been welded up and just ran as it is and a lot of times that's why they leak. There's certain things you wanna look for and do when you do a repair to make sure it's not gonna leak the oil. And then going to the lighting system again, there's no battery. So this is gonna run off a generator which we'll show you shortly but this has just an aftermarket side mount tail light.
And what I like about this though is that they didn't weld it in the frame, they didn't cut the frame to make it, they just retrofitted a couple bungs that fit into the stock plates so it's just bolted on. That's good to see. Lot of the old chopper days lot of the old bikes that guys built they were actually welding pieces on it, they were molding it with Bondo to make them flow and look nice. Well, nowadays if you wanna put the bike back to stock or have it more of a valuable bike with a stock original frame, you have to get all that stuff cut off, you have to reshape the metal you gotta fix it. Takes time, takes a lot.
So and then gas tank. Obviously this is a smaller style P-Nut gas tank okay? Normally these would have a split three and a half Fat Bob style, three and a half gallon, this is a P-Nut style I can tell here they used the stock frame mount which is good, they didn't weld in here but here I can tell that got bolted, they drilled right through the frame and just ran a bolt through it. Now for me anytime you'd have a frame that doesn't have holes or areas that were done by the factory it scares me. To drill a hole through this backbone means you're taking away it's strength, is structural ability, that's another spot that could crack.
So when I see that and then I see this and that's gone this whole top backbone here to me is just a, it's a, you know it's an explosion waiting to happen. It's gonna break off and that's not good. You don't wanna be going on the road and have that happen. So this little P-Nut tank that's on it is not stock. You can see the petcock and a fuel system here.
It's got kind of a aftermarket petcock there and turned the gas on some just rubber line put together and fuels strainer. Looking at the handlebars on this bike that go onto the front end. This is kind of a custom aftermarket dog bone style riser handlebar system with some custom bars. These bikes traditionally were a solid wire push pull not a snap throttle. So this has been converted with a snap throttle like a newer bike.
Which means when you pull the throttle back it's pulling that cable in, when you let go the cable releases on the old Harleys, the original ones, when you would pull on the throttle it was an internal system that actually pushed a hard wire out rather than pulling the cable in like this one. So this is all an aftermarket upgrade. You can see they retrofitted here like a snap throttle conversion and our carburetor's old original Linkert carburetor M74B which wasn't correct for this year motor but it's still Linkerts are good motors, are good carbs that have on all these old motors, they run real well. So I can see I got an aftermarket throttle that's something I'll probably wanna change put something more stock. I do have my front brake which seems to work and I'll go through that.
And then the headlight custom headlight that was just a little custom bracket made put on there and not stocked by far. So at this point we kinda gotta look at the left side had some things that we wanted to look at, you know the oil tank, I didn't talk about that but that's typically pretty stock style oil tank that mounts. If you notice any other type of an oil tank, if it's hexagon or a round one, then again you'd wanna look at did they modify the frame, maybe be I'll mount that thing Most of them will have a stock style horseshoe oil bag like that, but you know you can kinda get an idea now what to look for on this side. Now we're gonna turn the bike around and we'll get a good look at the other side and talk about the charging system on the other side of the bike and the primary. Okay so now have the bike turned around now we're gonna take a look at the left side of the bike.
And again, kinda go through it from back to front this time and see what's there, what we see and what we find and what's again red flag for stuff. So going back to the rear we talked about a drum brake and it was kinda hard to see right now 'cause there's a saddlebag on it. Now this is an aftermarket saddleback that hangs on it. Back in the day there was the old Buco accessory bags that were on them a lot. The stock Harley bags that actually ran with some plates like this and that's something to think about too.
If you're gonna run stock Harley bags and you don't have a stock fender, your mounts aren't gonna line up. This is an aftermarket small little fender 7 Metal West brass fender here would not take this type of a saddlebag. So keep that in mind. Are you gonna go truly stock with this? Are you gonna keep it a chopper?
But stuff that's in the way you wanna get it off so looking at this bike to get a good look at my drum brake. I would remove the saddlebag and get a good look at the frame itself behind it. Sometimes a accessory parts, saddlebags, different things, handlebar bags, the seat can hide things. Sometimes people will put things on to hide something there's a reason why they have it. Now this looks more like it was for functionality not to hide anything, but if we take off our mounts and we roll it forward we can get a better visual.
So this is why I wanted to get behind that saddlebag. There's a brake stay here. That brake stay, takes that mechanical drum and keeps it from rotating and spinning around and causing problems. These can get damaged. That can be a big, big, big red flag for safety issues.
If this brake stay is broken or bent, or the tab on natural drum brakes sometimes those crack off or bend or even almost ready to go. This one looks good. If you get into a situation where you have to hard brake and this is damaged or not in a hundred percent good working order and that breaks off, you lose your brakes, you're gonna hit somebody and it's gonna be dangerous okay? So that's in good shape, so that's good to see. Everything else looks good there.
You got your chain and we'll talk about chain tension and how that needs to be done correctly. But chains are a pretty easy fix. Usually when you buy a used bike just assume some of the small maintenance things you wanna do right away, one of them is just put a new chain on unless they can verify it as a brand new chain. This one you can obviously tell it's old, it's got some wear to it, it's got some slop and these chains do stretch over time so they're not something that you use forever. You do wanna replace those.
And when I get a new bike in the shop I always put a new chain on. Then I know and I can keep track how many miles I have in the bike to know that that chain is in good working order. I'm looking at this side now this is our primary side. So the other side you got to see kind of the face of the motor and the exhaust. This side of the bike tells a different story.
This is a, talk about our primary drive system which our clutch is involved in that, our motor sprocket and how this primary drive works. We also will see on stock bikes they had what was called a rocker clutch and a tank shift on them. This bike here was converted to a hand clutch so that obviously is not stock on a knucklehead they did not have a hand clutch knucklehead motorcycle. So how I can tell that there's been some changes 'cause there's a hand clutch on this bike as you can see here and then there's a clutch cable that comes down and I can see now there's a little aftermarket adapter plate screwed to the bottom of the oil tank mount here that holds that cable it's like a cable stay. All again all not stock for this year motorcycle, done to make it, you know, a custom bike for somebody that didn't wanna have to do a jockey shift with a hand or the foot clutch.
The transmission itself, this is a ratchet top lid they call it. The original Harley knuckleheads that have the tank shift would have what's called like a slop top lid. This is a ratchet lid which is traditional four foot shifts so you can click gears, click, click, click. You know 1 down is typically stock with a neutral in between one and two and then two, three, four is up. I'm looking at this primary cover, this is not a stock primary cover this is an old like an Imperial rib primary cover.
This kinda stuff though, you wanna look at because this is actually worth a lot of money. So pieces like this although they're not stock to the bike, some of these aftermarket custom components are really rare and sought after. So now you can start thinking to yourself, well if I want to replace this gas tank with a stock set of gas tank it's gonna cost me X amount of dollars and hey but I can sell this for maybe the same amount or more and kinda make that swap. So it's good to really look at what you have on the bike, do a full evaluation because the parts that you don't wanna run on it, if they're good parks and worth money you can sell them and get your money back and recoup for the stuff you wanna do. So this would be a good find if you saw something like that.
And again if you don't know, take pictures, go on the internet, even cruise on eBay and some of these websites you take a picture or something and look for it online you may find it and see that it's worth thousands of dollars you don't know or talk to your local bike shop. Looking at the motor again we had talked about the oil. Now this side gives me a better visual. The other side was pretty much oil everywhere it was hard to tell where it was coming from. Looking at this side now I got a better idea.
My front head really isn't leaking it doesn't look bad, there's not a lot of oil here. My rear head, you can see a lot of oil it's wet. So I think a lot of my oil issues are coming from this rear head. Maybe it's got a cylinder head gasket that's leaking, potentially a base gasket there, you can see a lot of oil coming down, but it's moving up from top down which tells me that my head gasket is leaking 'cause we've got oil way up here. If it was just a cylinder base gasket and the oil would just be from here down maybe a little bit up, but being that we're all the way up to where the head meets the cylinder, I know I'm gonna have to take this head off put a new gasket on there.
So that's something that I can tell myself right off the bat. Looking at the motor on this side again, clean, there's no oil on this side. So this one, you know other than taking the spark plug out, looking down the cylinder with a scope, checking compression, I wouldn't have to worry too much about this one. I think that one's in good shape. Going up here we have what's called the motor mount and this mounts your motor to the frame.
Knuckleheads have a specific style motor mount that bolts to the top rocker head bolts here. And these are notorious for cracking and breaking. If your motor wasn't put in correctly and shim correctly and everything isn't sitting where it needs to be, there's stress on this and they break. They snap, they crack here, they crack over there. So you always wanna visually look at that, and this is in good shape.
And we don't know how long this one's been on the bike, but typically if you look at these in a bike's been ridden and these aren't cracked, you can kinda tell yourself that hopefully everything's straight and true and sitting nice. What causes these to crack is if the motor wasn't in quite right and now you've got stress on that motor mount when you crank it tight and it's pulling on it. Well, that metal fatigues and now is vibrating and eventually cracks it'll give away. So you always wanna have your motor and all your transmission, everything should sit comfortably the way it is and then you shim to it to bolt it tight so nothing gets pulled or tweaked 'cause that's just a recipe for disaster. Looking at my intake, this is the stock they call this a plumber style intake so it's actually a big plumbers threaded nuts.
That would be stock on the older knuckleheads. Some people adapt them to the newer intakes with the rubber band style and whatnot. I'm not a fan of those, I liked the traditional stock plumbers intake. They work good but you can see there's some green goop on there so they probably had a little intake leak put some kind of a sealer on there to help seal up that from leaking. Plug wires again coming off the magneto.
And then looking down here we're gonna look at our charging system. So when I talked about the other side in the magneto and saying that there's no battery in this bike you don't need a battery. Well people scratch their head, well then how do you get headlights? How do you get tail lights? How does it run?
Well again that magneto is a self-contained unit that creates its own spark. Once the bike starts, these are old school technology, this is actually a generator, so this generates power. So once that motor's spinning, the gears and the cam covers start turning there's a gear on here that meshes, that gear starts turning and this actually generates its own power. So the lights will be off, you'll start kicking the bike, once the bike fires and starts and this generator gets going at speed, creates enough electricity your headlight comes on, your tail light comes on. Kinda really neat old school I enjoy it.
The problem with it is it gets brighter or dimmer depending on your RPMs. So when you're at a stop sign and a bike idols down, your headlights are gonna actually do that flicker. And they do sell capacitors that could hold the charge to help that I don't do it, I'm fine with it 'cause when you're at full speed it's got full power everything's bright. But that's something to think about okay? The generator itself if you're running a magneto and even if you don't run a magneto they all have generators 'cause they help recharge the battery.
This one here is actually an aftermarket that has an end mount voltage regulator. So that's another piece of the puzzle with electrical okay? You gotta have a system that charges the battery but doesn't overcharge the battery and fry your system. Now on most of these old bikes 'cause they're kickstart only, you don't need a big, huge 12 volt battery there to pump electric starter. These came factory stock has 6 volt units.
6 volts is not a lot of power, the headlights were dim. Well, this one here was actually converted to a 12 volt system. So we've got a 12 volt generator in it with it end mount voltage regulator so that if it had a small battery, it wouldn't overcharge it and you could put a 12 volt battery in now and run 12 volt bulbs and it wouldn't blow the battery up. If you have the incorrect, if you have a 6 volt battery in a 12 volt generator you're gonna overcharge that battery and it's gonna blow up on you and die you know right away. So always check your stats, make sure the bulbs in the headlight had to be switched to 12 volt 'cause if they were 6 volt they would burn out.
Same as the tail light. So little things like that are good things to look at. Now real important part of these bikes is the VIN number okay? When you get an old Harley Davidson motorcycle they are titled by the engine itself. There's no VIN numbers on the frame, there's no VIN numbers on the front end, there's no VIN numbers anywhere else except for on the VIN number boss pad on the actual motor itself.
Now this can be the single most make or break deal on an old Harley because obviously bikes through the years if a bike's been stolen, if it's been blown up and as replacement cases or just whatever reason the bike was a mismatch of parts, your VIN number is going to tell a story of what should this bike be. Now this motor here looking at the VIN numbers I'm gonna go it through real quick there's a number sequence on these. There's always a two-digit number to start. Those first two digits tell you the year. So this one says 47.
So I know this motor is a 1947. I have other bikes I'll show ya, if it says 39 for instance that would be a 1939. If it says 41, it's a 1941. So always look at those first two numbers that will tell you what year it's supposed to be or the title's supposed to say. And then you'll have two-digit letters after that two letters.
And those will be like EL, FL, UL, or it could be a three digit ULH, could be a single digit like an F, FL. That tells you the cubic inch of the motor. So in this case, this one here is a '47 EL. EL was a 61 cubic inch knucklehead okay? 74 inch knuckleheads where the FL or the Fs.
So E and EL are 61 inch, low compression, smaller motors, F and FL are the higher compression, bigger motors. And then the last digits will be usually like a four to five-numbered code, that's just the production code of when it was made in that year. So you always wanna look at that, make sure those numbers look good, make sure they weren't botched, changed, altered and then check the title. Does the title match that so that you have a legit bike. If your title doesn't match those numbers you're in trouble you got something that's not legal to have on the road.
So be aware of that. Looking at our foot boards we got stock foot boards on this kind of a bike, kickstand mounts underneath on a kind of a single plate that mounts everything there. And then again the front brake, cable comes down to a drum with our rockers here, drum brake assembly and everything in there looks good. So kind of in recap of the bikes, look at them from both sides, do that checkpoint list everything that I showed you, go through it step by step, take notes, write down information. You see something write it down.
Ask questions if you don't know ask. And you know, a lot of times the guy who selling the bike he's not the one you wanna ask, you wanna ask him questions but don't ask them some of those questions where you think he's trying to pull something over here 'cause he's gonna tell you what you wanna hear. Talk to your mechanics, talk to your experts, do some internet search, just be smart about it so you don't get hosed in the long run buying something that's not gonna be worth the money or in the case of like a botched VIN number and bad title you can get the bike confiscated. If you take a bike to Sturgis, the cops there will go through and they'll check VIN numbers on main street, if they see a VIN number that looks botched, they'll run it and then it can come with a paddy wagon and to actually confiscate your bike you don't want that to happen. So be smart, be, you know be legit about everything and you know there have been cases that get repaired though.
These bikes did blow up in the past, there've been reproduction cases that had to go on and that's okay. As long as everything was done correctly through the law so be aware of that. Now we're gonna look at, the reason why I talked about taking this apart is 'cause I've found a bunch of problems. There's a missing crosstube here and I have a better frame right here that I'm gonna reference. And you know see this frame, this is that missing crossbar.
The lower structural crossbar that I said was cut out of this one. This helps put strength and rigidity in the whole bike here the whole frame. With this being gone now you have more flex in your neck and you gotta understand what the springer front end it's not a nice hydraulic, you've got a more bouncier front end, you're putting a lot more stress and strain on that neck casting, which is gonna cause cracks either here or there and cause things to break which we talked about seeing this piece of angle on here it tells me that because they cut that out, we got a crack in this frame and they just took a piece of angle iron and a welded it underneath to try to do a quick fix to keep riding, all right? Looking at tank mounts on this, I talked about how this one was drilled through the frame and mounted. You can see how the tank mount should look, the tank should mount on a plate like that for the stock style tanks.
So these are obviously cut off to fit that tank and they just drilled a hole and put a pin right through it. The seat they welded that seat mount on here you can see that's not here because we'd have our pogo seat to pogo that goes in. And one thing this one we talked about is really, really dented in severely. This one actually you can tell has a dent too, it was pounded in a little bit. But I'm gonna be able to make a bar and a slag go on there and heat that up a little bit and I'll be able to pop that back out to run a stock pogo seat without much effort.
That one there would take a lot more work and with all the other stuff on a frame that was wrong, it's better sometimes, you know I'm not gonna throw this frame away 'cause it's still an original Harley frame. I'm gonna fix it right though so that means I'm going to take it apart, I'll put it in a frame jig and I'm gonna start from front to back and fix everything. But to keep this bike on the road I was able to find a frame that's in way better shape, that has everything I needed, so I'm gonna just switch everything to this frame so the bike can keep running be on the road and then I'll fix that frame slowly and then down the road build another bike with that frame. So that's what we were looking at there, what would happen there and again you know things like sidecar loops are here and what's nice is when these frames are apart and you get everything off you do wanna do a visual inspection here. The front motor mount pad a lot of times these would get cracked and break.
This is in good shape. Our down post here we can see our rear motor mount pad looks good. Our brake crossover tube where our brake goes through for mechanical brake, our transmission mounts, our footboard mounts, all in good shape, rear axle plates in good shape and there is casting numbers that you can look at on these to actually reference what year they are. Now I talked about this one being a panhead frame, a 48 panhead 'cause you can see it's got a wishbone down tube, this is a straight-leg rigid okay? So that's, there are differences like that too you wanna look at.
This one's missing the the front lower tank mount for the split tanks. This one has it. So this one here looking at it visually I should be able to mount all my stock stuff back to this, everything should go in easy and then if I wanna run this tank I'd have to be creative again with the front mount and mount there but my rear mount now I'd have to do something. I don't wanna weld on this frame like that one did. So I'm gonna probably go back to more of a stock system.
Another important piece of the puzzle. When you're working on an old bike there's so much stuff that's changed through the years and you may be really good at working on a new bike, maybe you have your own "Fix My Hog" will help you with all that stuff. But for this older stuff, you know this is a lot of outdated technology there's not a lot of mechanics anymore that know how to work on the old bikes reference materials are huge. Utilize service manuals. I can't stress enough it doesn't, I don't care how much you think you know, you can always know more by looking at this all right?
You never want to stop learning, when you stop learning you become obsolete. You don't wanna be obsolete you wanna be on top of your game whether it's a new bike or an old bike so utilize your service manual. These were put together by the factory for reasons of helping mechanics work on the bike. So you as an owner now you're gonna be able to get schematic and blueprints of every piece of this bike to tear it down. So any questions you have can be answered.
If you wanna restore a bike, there's how to, how to restore bike books out there. Utilize that, tell you all things on what should be what on a certain year. If you wanna build custom, I wrote this book and how to build an old school bobber, choppers and bobbers are kind of the cut down, stripped down version of the bikes back in the day. These are great references to look at. Give you examples, tell you what's what, kind of stuff I'm talking about right now you can look at it and you learn it more, you see it, you can watch "Fix My Hog" to get it, you can look at the manuals and with all your references and all your, all the internet out there for you at your disposal, you should have no problem being able to work on these bikes.
So the stuff I talked about and I'm gonna show you, don't let it scare you off. I'm not trying to scare anybody off from getting into old bikes. I love old motorcycles and I wanna see all the old bikes out there, come out of the barns, get on the road. and you know, we're here, we're a big family, so work with us, look at what we got to offer, we're gonna help you successful with your old project. And then parts catalogs you know, the old Harley parts catalogs just to see reference part numbers.
This is a '41 to '84 parts catalog. So if I wanna know okay, what do I need for this plumbers intake? Well if you don't know it all, you can look in here and find that part number reference it and then go on the internet, there are companies that make reproduction parts. Otherwise you're local swap meet, Craigslist, eBay, all that stuff start searching, look for right parts it's out there. Now what we're gonna do, we talked about this bike and kind of the issues I showed you.
Now I'm gonna compare it with an actual couple of different bikes. And they're all knucklehead bikes but the difference between them is one of them is a pretty much a stock Harley knucklehead, one of them is a bobber cutdown, pre-war knuckle bobber and the other one's an aftermarket knuckle. So it's actually all new parts to make it look like an old knucklehead chopper. So I'm gonna get those bikes out and we're gonna take a look at them and we'll give you a little more insight on those how they compare to this one. All right now we've got a couple of bikes sitting out front here and take a look at just to kinda do a little comparison.
Now with this bike that we're talking about on the lift, it's kind of a cutdown little chopper bobber kinda mix, you know a collaboration of parts from different years, different eras and you know something that was just made creatively by somebody to express themselves in their own bike. But now we have a couple other examples. This first one, I wanna show you in the center here, this is a 1947 FL. So looking at my VIN number boss and like we talked about it's a '47 FL and then a four-digit code. This is more of your stock style bike.
This is kinda closer to what the bike would have looked like from the factory. Now, obviously this is old and it's got a lot of rusty old parts on it, but it's got a lot of the stock stuff that you would look for in a factory bike. Few minor details, the front end is actually a VL fender, but these are those those split tanks we talked about. This is a stock style split tank. No magneto so this one does have a battery in there.
It's got what's called a timer on it okay? These are not a distributor. Some people call them a distributor you think of a car. Well distributor distributes to all their six cylinders or eight cylinders, this is just a timer all it does is times your ignition and when it sparks. And these can actually retard and advance from the handle.
And we talked about that snap throttle conversion on that one, this bike has that push pull system. So when I pull on that throttle and I crack my throttle it's actually pushing as hard wire out to give me throttle. And you can see how it doesn't snap back it'll stay wherever it is. So it's kind of a cruise control for it too. It won't stay a hundred percent but you can adjust them a little tighter or grease them up.
But if I give this thing full throttle and start it right now this bike's gonna be full throttle it doesn't snap back. And he can see it's all internal, no wires or cables, everything back in a day Harley was really smart about cleaning stuff up. And you see a lot of the new custom bikes today trying to recreate that internal throttle clean look. But the both grips actually turn because like I say you retard the timing to start it starts easier and then you advance the timing to make it run the way it should run. So pretty typical stock 47FL bike.
Over here we have a 1939. Now this is a pre-war knucklehead. And this one's cut down into a little bobber style. It's kind of a race style bike. You can see it's got studded tires on it for ice racing.
It's got the Flanders kind of race bars and again stock style tanks and a lot of the stock stuff. It does have the timer, same thing, advanced and retired. And this one is oily and greasy too there's some things that need to be fixed, but this is a pre-war knuckle and there's a couple of ways to check that. Obviously if he check the VIN number this one's a '39 El VIN number which tells me what year it is and that's pre-war. The other way on these stock motors is the look.
This one has a rib cam cover the later style Harley's had ribs on the cam cover. This is a smooth cam cover, you can see that it's all smooth there no ribs on it okay? So and then it's also on the other side of the case there's ribs down the side of the case by the VIN number. This is called a short rib case motor because the ribs are shorter, this is a long rib case because the ribs go all the way up. Just little things to look for, if you saw, let's say a '39 EL VIN number but have long rib ribs on the case, you know, that's not correct it would be, something that was was done there and changed up.
And then lastly we have here this is a full off custom bike with all new parts but using technology to look like an old knucklehead. So this SNS motor a knucklehead style motor is a 93 cubic inch motor made with all new technology, new materials, good aluminum and whatnot, nothing's cast like the old days and it's really a bulletproof big inch motor so that you can kinda see the difference now from stock kind of a rat bike, you gotta cut down bobber, you got a little chopper and then you've got a new custom. And there's so many options for you to do that. I could take this bike apart now and make a decision. Do I wanna go bobber or do I wanna go stock?
Do I wanna keep it chopper and kinda do my own custom thing? This is where, you know when you buy a bike, it may not look exactly like you want it to look when you first pick it up and that's okay 'cause everybody likes to change their bike a little bit and make it their own okay? But by doing our checklists, looking at what needs to be repaired and replaced and fixed and what's wrong with it, as you go through and make those changes, you can start to transform the bike into whatever style you want to make it your own so that when somebody sees and say wow, you know they know it's your bike and it's something that you can be proud of. So that's kind of a little difference of them all to give you that variation. And you know there's tons of cool bikes out there, they all have different styles, there's no right or wrong reason, it's all personal preference.
Share tips, start a discussion or ask other students a question. If you have a question for an expert, please click here.
Already a member? Sign in
No Responses to “Buying a Harley Knucklehead: What to Look For”