Harley Davidson Air Intake Install with Roland Sands
Bob LaRosa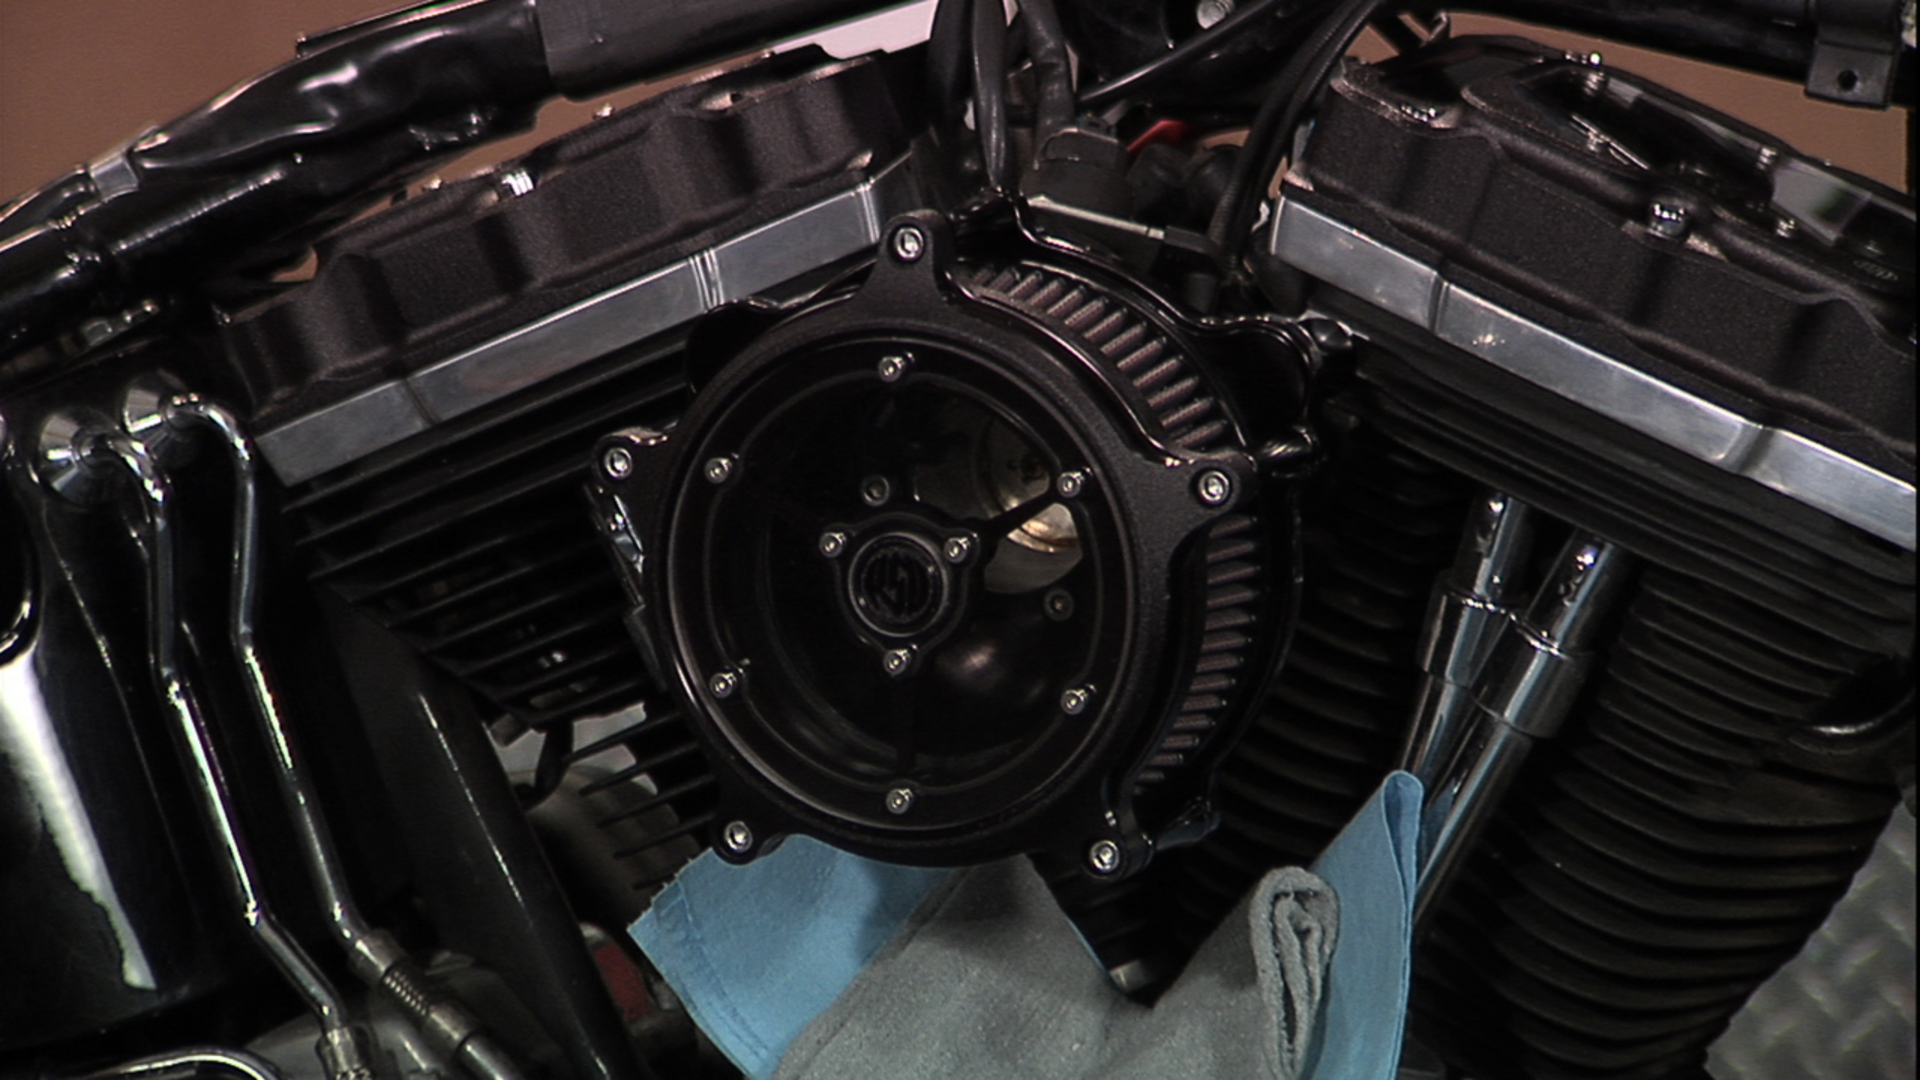
Video Player is loading.
To continue with the upgrades on this Harley Bob get’s ready with the Roland Sands Design air intake. He removes the current air intake by making sure to cover all the areas below where he is working. No need to damage another component when installing a new one. Make note of what you take off and put it away in a safe place for future use or maybe a friend wants what you just removed. Always have the manufacturer’s instructions and your service manual before you start the install. You’ll need a little blue Loctite and the new gasket. Bring the backing plate up and get the bolts started. Take your time and bolt-on the remaining parts. Give it all a wipe down when you are done.
Next Video: Harley Davidson Derby Cover Install with Roland Sands
Related Videos:
Roland Sands Design Review
Harley Rocker Box Cover Upgrade
Harley Cam Cover Upgrade
Clutch Cover Upgrade Install
Harley Davidson Derby Cover Install with Roland Sands
Clutch Adjustment
Exhaust Removal and Replacement