Evo Harley Rear Tire Install
Mike Roen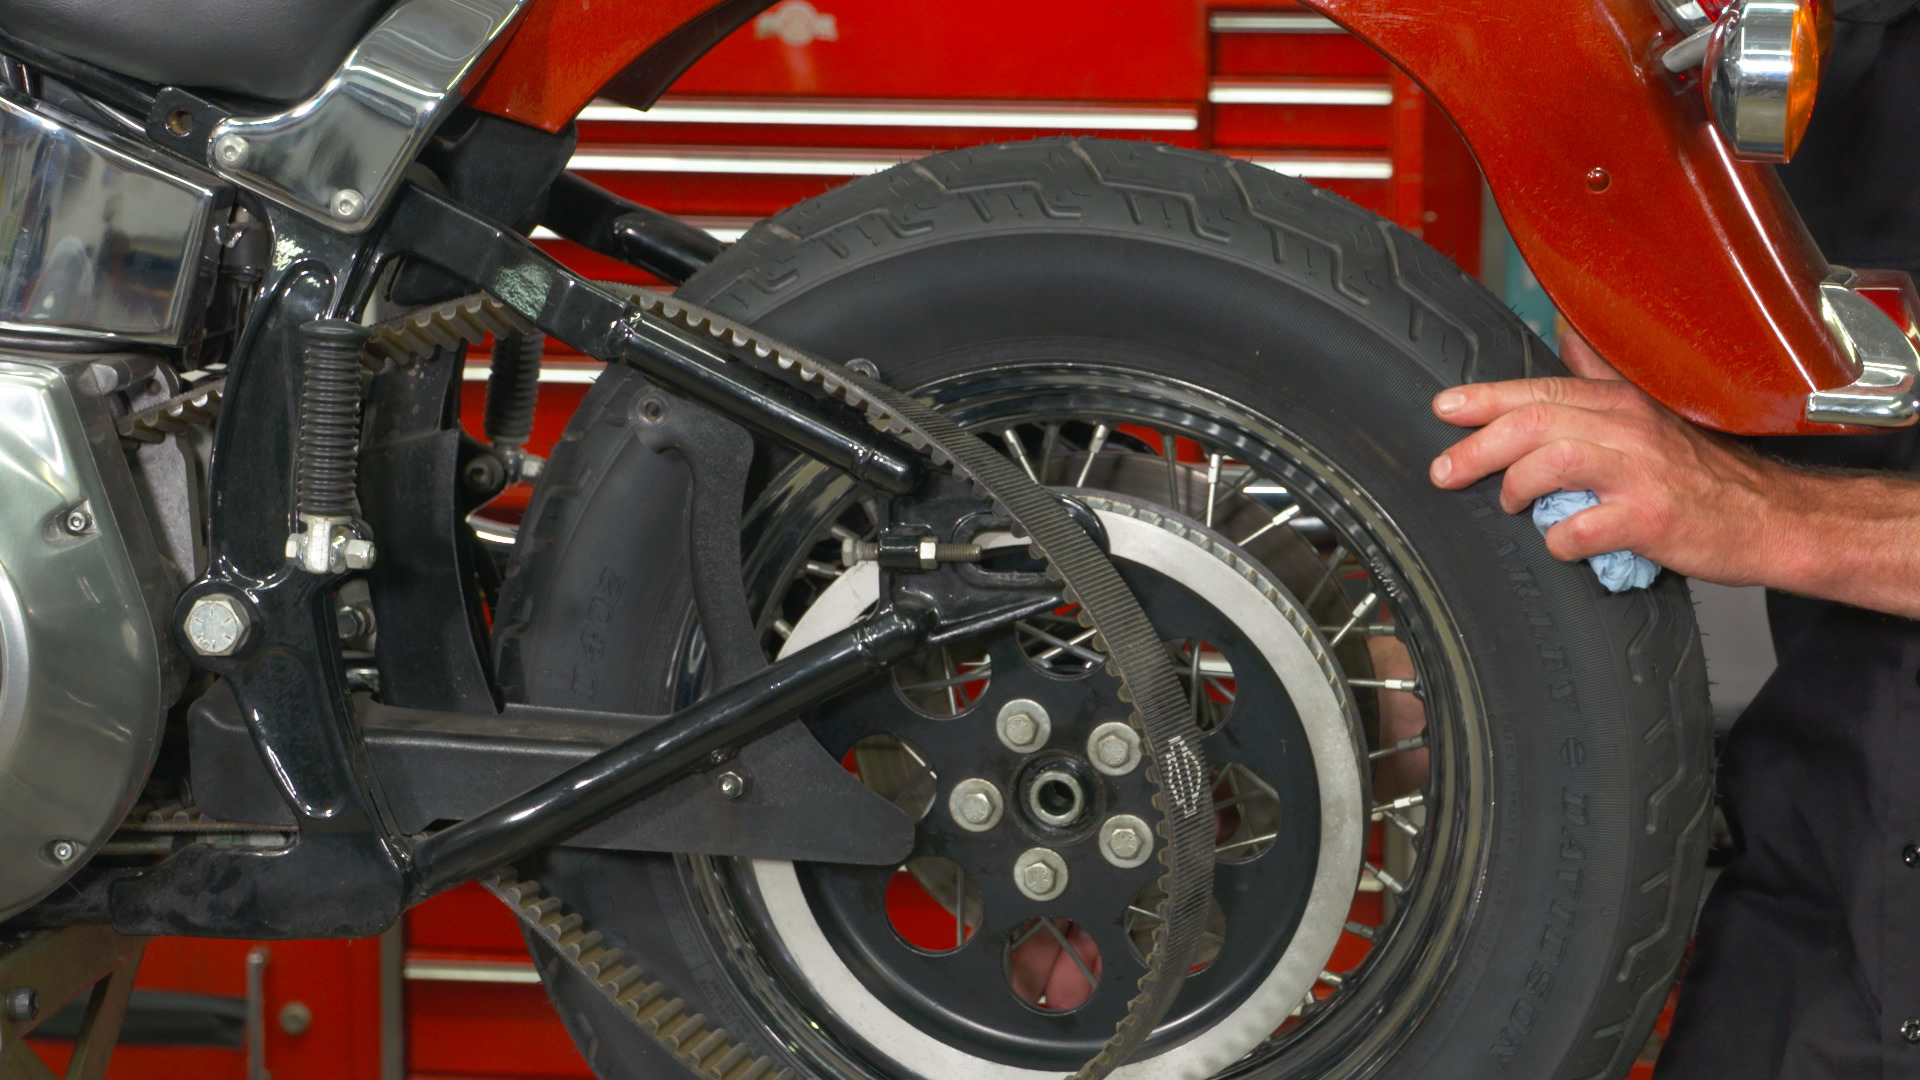
Video Player is loading.
The front wheel has already been addressed and a new front tire has been installed. While the front wheel was removed, Mike inspected spoke tension and front rotor hardware.
He also serviced the front wheel bearings, which involved cleaning, repacking grease, and wheel bearing seal replacement. A new speedometer drive seal was also installed during front wheel installation.
Now, Mike has moved along to the Harley rear tire. He has already serviced this rear wheel, just like the front. Additionally, Mike has checked torque on the rear pulley hardware.
As always, Mike stresses the importance of inspecting everything you can—especially when you are in an area of the motorcycle that has been taken apart and opened up.
The drive belt and rear pulley are closely inspected for excessive wear or damage. Mike also inspects upwards, under the rear fender. He verifies that all hardware is secure, especially the rear turn signal mount which is prone to loosening. Mike also inspects any wiring that is routed under the rear fender. He checks for any previous wheel rubbing that would need to be investigated. Rear rotor and rear brake pad conditions have also already been inspected and determined to be in good working condition.
The Harley rear tire is now lifted into position inside the swingarm and under the rear fender.
Mike slowly lowers the flat jack, periodically stopping to check proper wheel alignment inside the swing arm. The drive belt is pulled over the rear pulley and the left side axle spacer is installed. The axle has been coated with grease or Anti-Seize. When everything is lined up correctly, the axle is pushed through the assembly.
Mike sets belt tracking and belt deflection. After the rear axle nut is torqued to spec and the rear brake is pumped up, the Harley rear tire job is complete.
Hey, it's Mike Ro and fix my hog. We're back working on the 1988 heritage. Uh We did a full service video on the website and we had, you know, we had the front wheel off. Uh We did the wheel bearings and the tires were of course, completely shot. Uh Dunlop.
They hooked us up with some D 402 tires. Excellent tire, great load rating for Harley's, you know, heavy motorcycle. So I went ahead. We got the front wheel, all done. Mount balance, repacked rear wheel, same drill, new tires, new tubes, repacked the wheel bearings and we're gonna go ahead and put this in because we didn't, we didn't show that on the video.
So just the whole procedure there again. Keep in mind you got the wheel off time to look the bike over time to look the belt over. We're looking for rocks, we're looking for cracks. We're looking for deterioration on the teeth because I don't know how many miles are on your motorcycle. But drive belt is pretty important.
Check it out. Look it over, take a peek up in here. Let's look at your tail light, wiring has it been rubbing on your tire is your turn signal bar, Lewis tighten it up. So you got the wheel off. Obviously, we're checking the brakes.
These brakes are in excellent condition. So just simple things when you got the wheel off, take a peek at it because it'll save you a lot of time. Typically I'll put the whole wheel on. Then I'll go. Oh, this turn signal bars loose.
Sure, hard to get that. It's way easier at the wheel off. Here we go. Now we're gonna do this with the rear brake caliper in and I've got the upper belt guard off. Typically, with this mt 90 kind of gives us enough room here to kind of slide it by the rear brake.
And of course, we got the luxury of having a motorcycle air table with a lift. You know, if you're at home and you're doing it on the ground, it's gonna be a little harder. Probably gonna want a little help, maybe. So we're gonna kind of sneak up on that rear brake because it's gonna be hard to align. So get that out of the way, drop her down a bit.
Typically, I've got the jack on the other side. Our whole dilemma is getting this caliper in between the brake pads properly. Just take your time if you really wanted to, you could pull the whole caliper off. So we're just gonna, I think mentally sneak up on it here. It's close I think we gotta go down a little more.
We're gonna walk it down a long ways because here's what we're looking at. We gotta get the axle hole down there. So had to jack it up fairly high to get the wheel out of there with the caliper on. Bring her down within reason. Now, let's take a peek.
Much better. Ok. Don't forget your collar and of course, now we're gonna, yeah, I think I can probably slip that in once I put the belt on, so I'll put that down here. Let's get the pain on. Yep, I can still get that in.
Ok. Got the axity, pre greased. She's ready to go. Ok? Shouldn't just slip right in.
Maybe not a little more, should be able to just about line that ax lip so you can see it right through the hole. Excellent there. Got that rear caliper, get your collar by there. Ok? It's all home now.
It's easy. Now, actually I'm gonna jack this back up a little bit here. Free wheel a little bit. So that side. Ok, snug it out.
I'm gonna get this snugged up. And more importantly, we're gonna turn the key on because we always check our brake light and you know how we check the brake light because we wanna pump up the brake. If you don't pump up the brake, you could have a pretty scary moment right out of the gate. So we got a break late and we got a break. So let's drop it on the ground here and set the belt deflection while we're doing that.
We got our handy little tool here. And of course, part of the video you did a spoke adjustment. Anytime you're checking your tire pressure, you're checking your belt deflection, you're checking your spokes because spokes equal maintenance. All right, if you look in the factory manual, they actually give you dimensions of how to make this out of a piece of welding rod. So check out the manual and make yourself a little tool.
So what we're doing, we're gonna go from the center of this bolt, which is the center of the swing arm bolt to the center of the axle bolt. And we're gonna do it on both sides because we're gonna make it even. So got her set there go over here and I got it set on the money because I already set it on the money. So I wanted to make sure it was. And so is the belt deflection because when we did the service video, we went through the whole procedure and, uh, we had the belt guard off and we did have it up unweighted off the ground.
And if you're reading the manual, of course, they're saying back in the day, they said they wanted the weight of the motorcycle on it and they said they wanted to individual sit on the bike. So, uh, they don't say that in the manuals anymore, but back in 88 they did. But at any rate, we got the belt flexion set spec, I've got the alignment, front to rear set properly. And another thing you're gonna wanna check because I don't know how long you've had your motorcycle or if you just bought it, but if you did just buy it and you're putting tires on it, somebody's probably been working on this motorcycle before you. So just go ahead.
If you didn't have to adjust it, make sure these are tight because somebody might have been playing with it and they left it loose. So check that side, check the other side and of course they're tight. All right. So now we're gonna torque the excellent. Just gotta take the muffler off here.
Ok. Set that out of the way you're looking in your manual. It's not like your twin cam bag or nothing. You're saying 60 to 65 ft pounds. So it's got a tin wheel bearing.
Here we go, slip that back on. All right, clean that up. I'm gonna wipe that muffler off, get my fingerprints off that thing before we light her up. And really, you want to get in the habit of checking your tire pressures. People always cry about tire life, but uh every time their motorcycle comes in, the tire pressures are low, you put a lot of heat in this motorcycle.
You got two up ride and you're loaded down and you got an underinflated tire. Where's your tire out? It's pretty dangerous. So, I always check your tire pressures. I'm guilty of it.
It seems like a month goes by real quick. And then all of a sudden I go, wow. I haven't checked my tire pressures. If you're on a road trip and you're going across America, you might want to check it every morning before you take off and leave because, uh, you pick up a nail or you're on the road and you're in the middle of nowhere, you don't really want to get a flat tire. Ok.
Well, let's start these first here. So it'll kinda line me up a little better. Your twin cam has the luxury of just having the two bolts. The Evils got that third one in there hardly figured out that they didn't need that one up front on the twin cam. Ok.
Maybe we can find it now. Maybe got her started here. We go, get up here and get this one snubbed up. Ok. Like I said, every time you're going to check tire pressures, belt deflection and really over time, you know, the more the longer you own your motorcycle, the more you're gonna develop a feel of what proper belt deflection feels like.
Harley makes a little special tool. You're looking in your manual, you got a soft tail, soft tail, it says check it on the top touring models, you know, check it on the bottom, dina whatever the manual says. So, read your manual, just get in the habit of basic things. You know, you gotta check your tire pressures, you know, you gotta check your spokes and you know, go, you gotta check your belt flexion. So, all right, thanks for tuning in and ride safe.
Share tips, start a discussion or ask other students a question. If you have a question for the instructor, please click here.
Already a member? Sign in
No Responses to “Evo Harley Rear Tire Install”