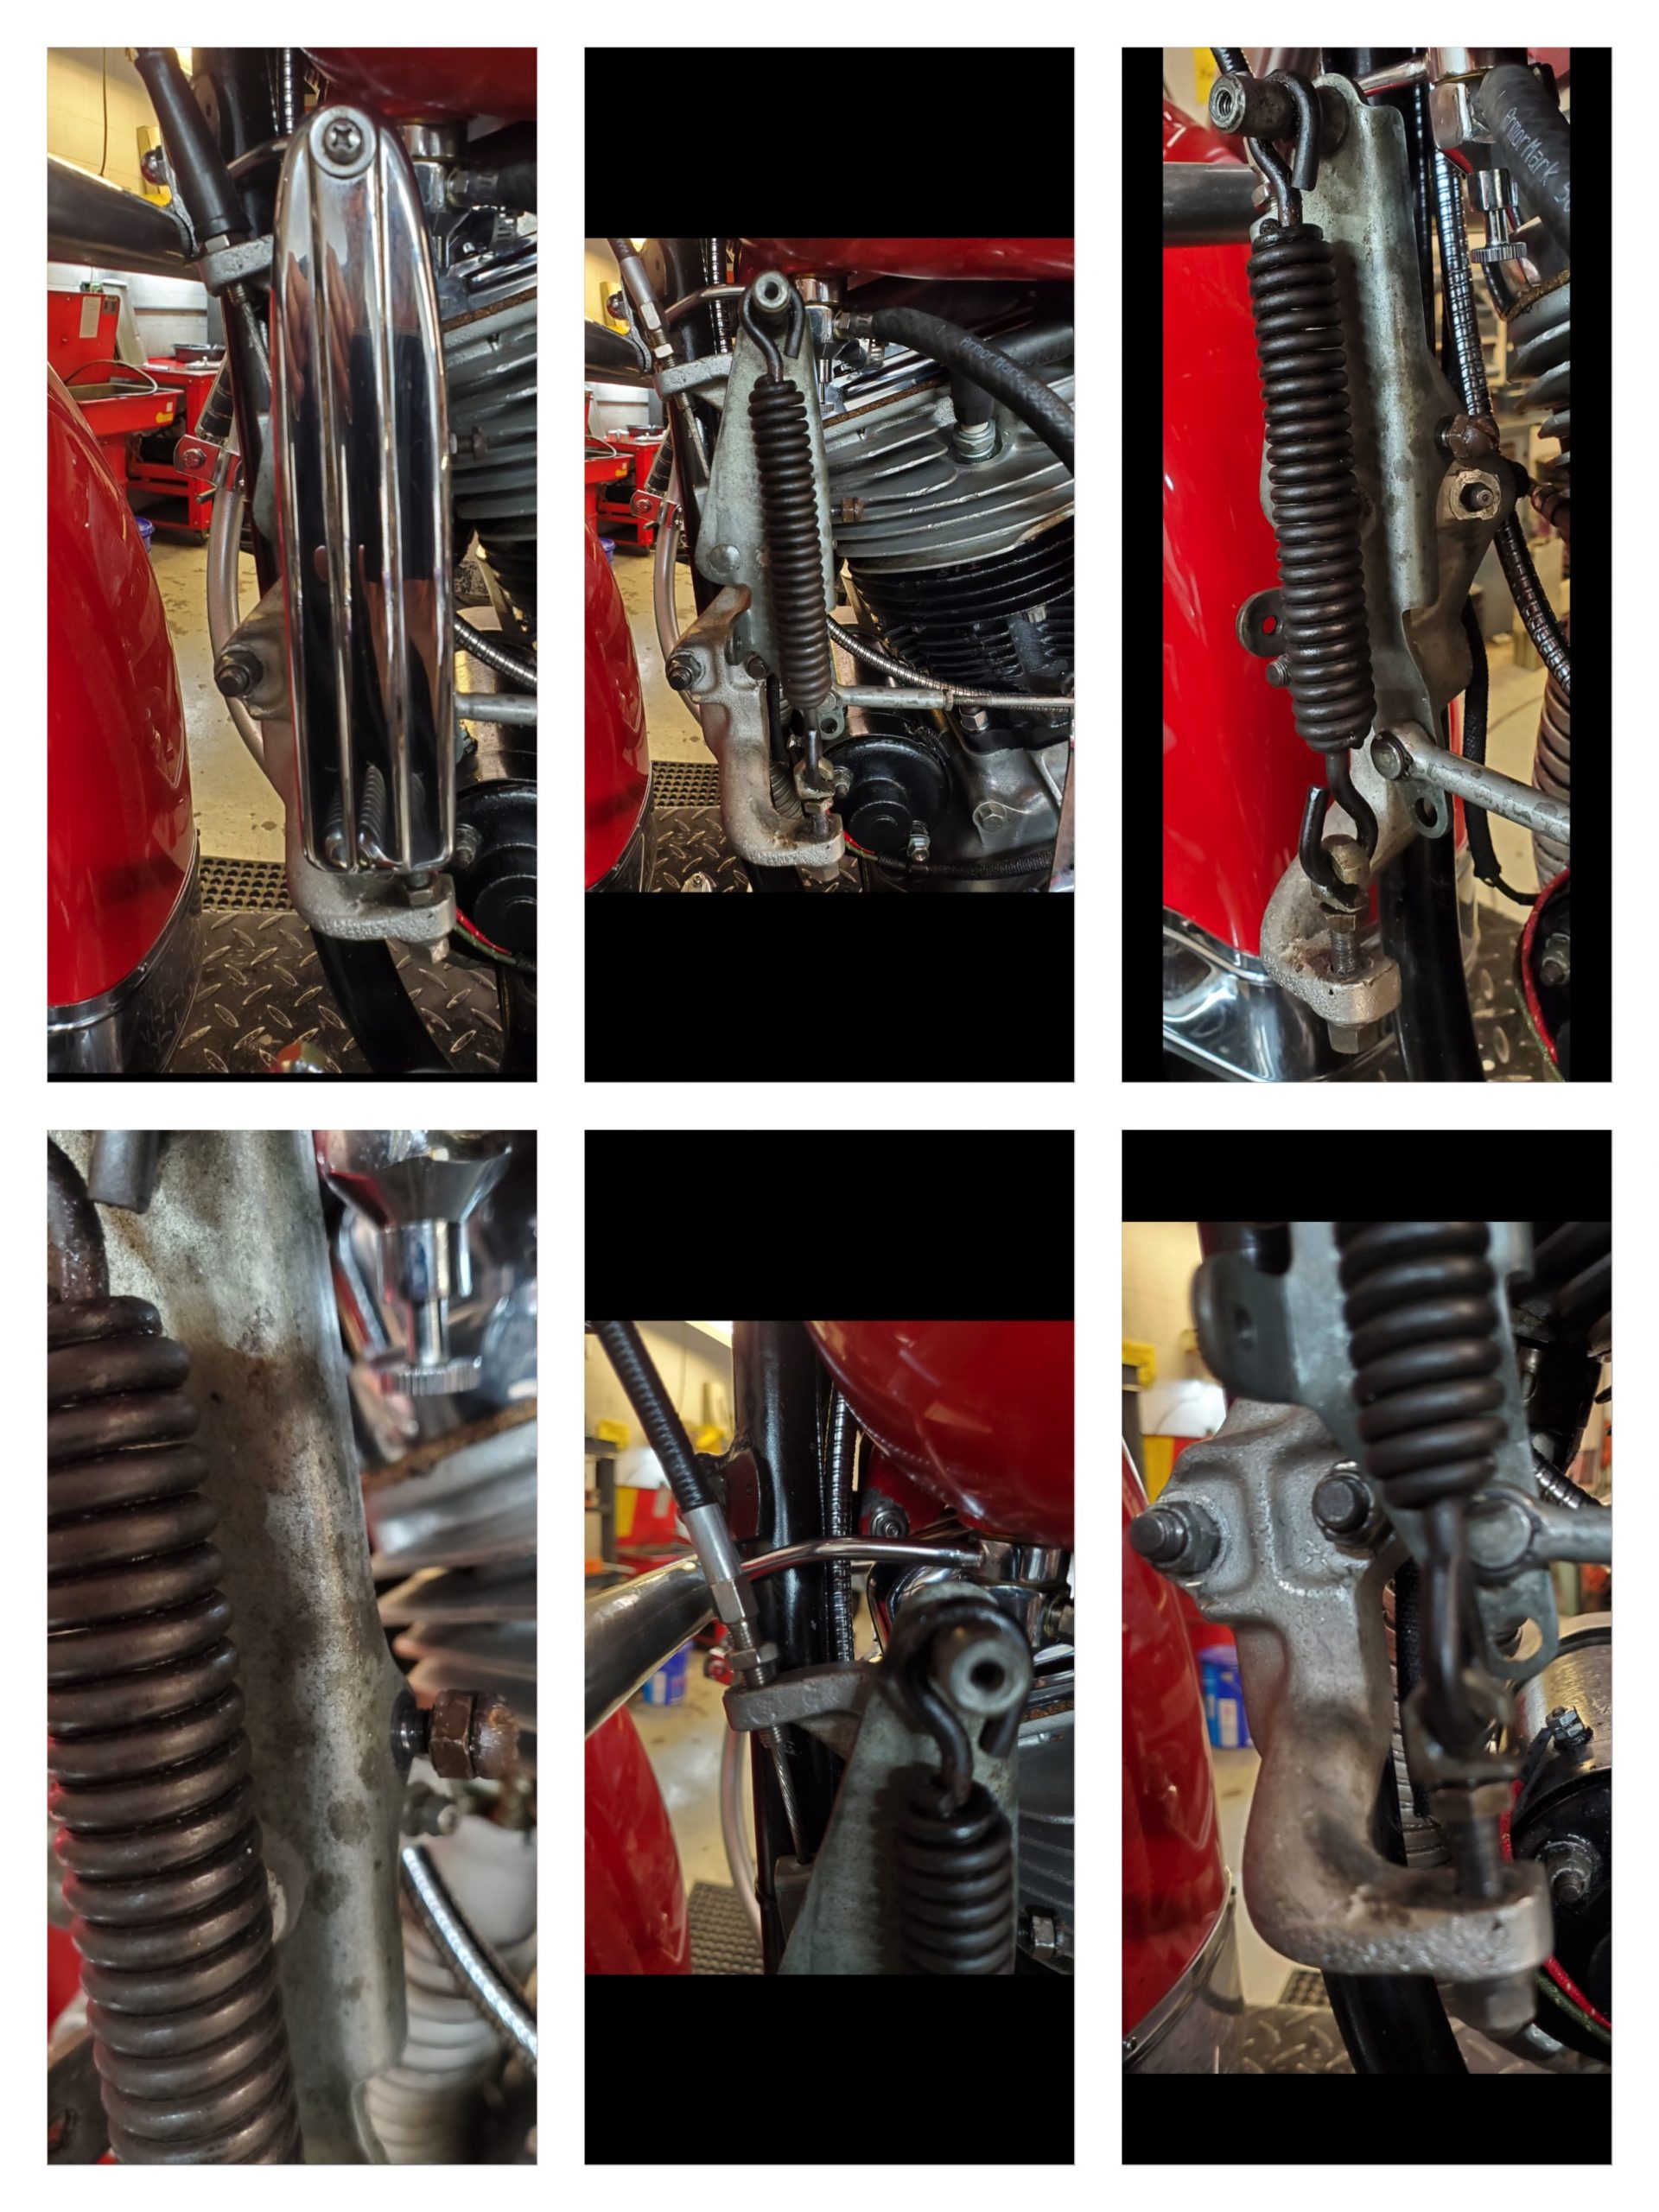
Harley Mousetrap Assembly – they have always been in the how to build a better one business.
In recent years, many Harley Davidson owners have become used to shifting with a hydraulic clutch assembly. These assemblies do not have any adjustment and maintenance only consists of periodically flushing and bleeding the system’s Dot 4 brake fluid. If you do not have a hydraulic clutch assembly, you have a modern day conventional clutch assembly. This clutch has two adjustments. One for the clutch push rod / adjuster plate and one for the clutch cable.
But, let’s take a ride down memory lane; rewind to almost 70 years ago and, as you can imagine, the assembly looked and functioned a little bit differently. In 1952, Harley Davidson began using foot shift assemblies in replacement of hand shift assemblies (also known as a “suicide shift”) on their Big Twins. This also meant changing from a foot clutch lever to a hand clutch lever.
Owners, however, complained that they would have trouble pulling the clutch lever or holding the lever in while at traffic lights. Harley’s solution for this issue was their clutch booster assembly, more commonly known as, the Harley mousetrap assembly. This Harley mousetrap assembly was used from 1952 to 1967. The adjustment procedure for this assembly has a number of steps however, the process is not difficult.
Start by loosening the clutch shift rod and loosen the clutch rod adjuster screw lock nut.Turn the adjuster rod until the shift actuator arm is correctly positioned and then lock the jam nut.
Next, slacken the clutch cable adjustment and also loosen the lock nut for the bell crank adjusting screw and turn the screw inward until the bell crank fails to stay positioned over it’s center point.
Now, loosen the upper adjusting nut at the bottom of the large spring and back it off as far as it will go.
Now we can begin adjustment of the Harley mousetrap.
Begin by loosening the bell crank adjusting screw until the bell crank moves over top, center and stays on its own. Lock the jam nut on the adjusting screw. If correct, the assembly will be approximately 1/8″ over top, center.
Next, adjust the shift linkage rod until it only has about 1/16″ of play.
Move on to the clutch cable. Adjust the cable so that it has approximately 1/2″ of free play at the lever and lock the cable’s jam nut.
Now, hold in the clutch lever while turning in the lower spring adjusting nut. Continue turning the nut inward until the clutch lever will stay (pulled) inward on its own.
Then, back off the adjusting nut until the lever will return on its own and lock down the spring’s jam nut.
When completed correctly, you should have a nice, smooth lever that is easy to pull.
If, however, the adjustment does not feel right, you will need to start the adjusting process over again from the beginning step.
We realize that the majority of our members will never own, ride, or service a Harley with a Harley mousetrap assembly, but we hope to give some insight on Harley Davidson’s mechanical progress and innovation through history.
Some Images of the Harley Mousetrap Assembly

Related Videos:
Harley Davidson Clutch Upgrade
Clutch Adjustment
I cannot find a video on how to install the mouse trap from scratch. I have a 63 Panhead and I installed the assembly however cannot get the position correct so the cam or spring returns after pulling in the clutch. So i cannot properly adjust the clutch. Can you provide some help, thank you.